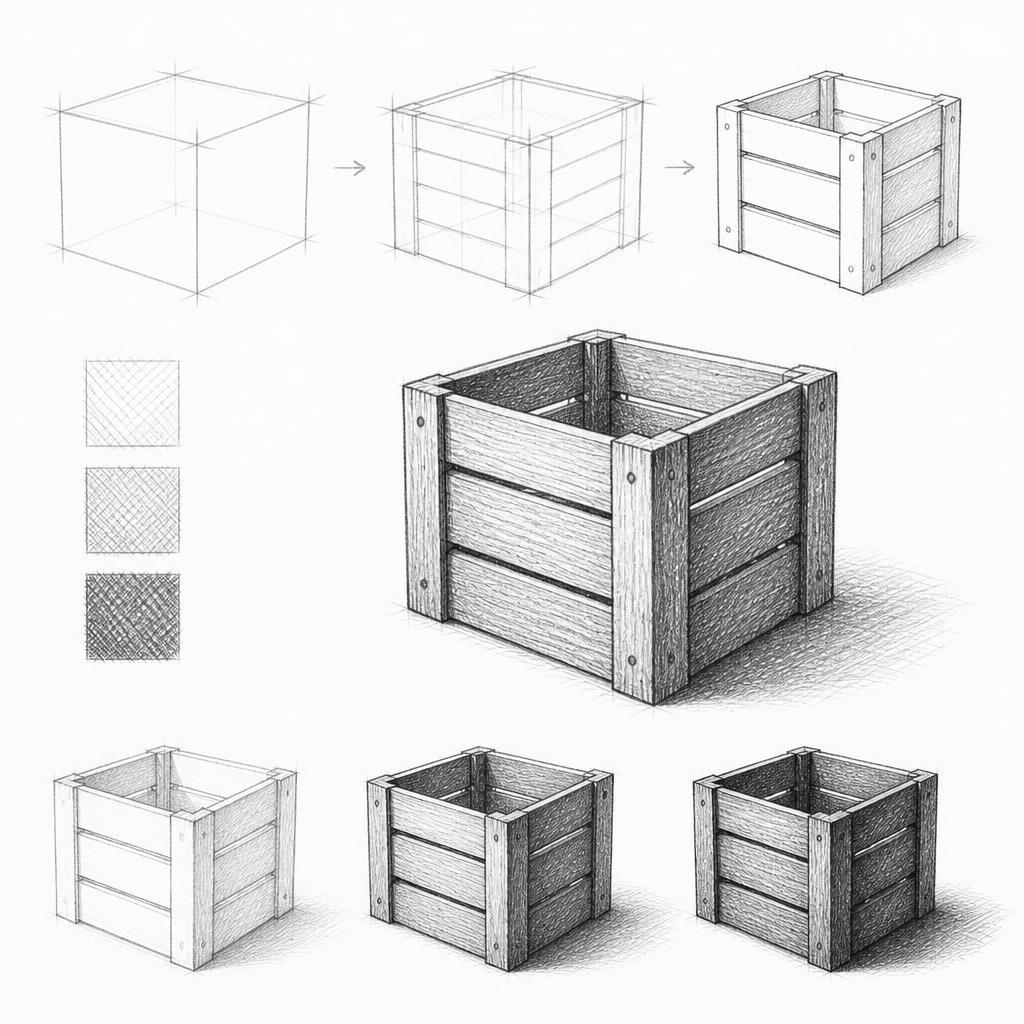
What you'll learn
Drawing a wooden crate allows beginners to practice the effects of light on flat surfaces and the cast shadows they create. The texture of wood also gives an opportunity to explore cross-hatching to add depth and value.
What you'll need
Step-by-step: how to draw wooden crate
Start by lightly sketching the basic shape of the crate, focusing on its rectangular form.
4 more steps, the pro tips and the checklist
Today's exercise is free to everyone, in full. The archive is part of Pro, along with AI feedback on your drawings.
Try 7 days free →Already a member? Sign in
Frequently asked questions
How do I make the wood texture look realistic?
Use varied cross-hatching lines to mimic the grain and knots in the wood. Observe the reference closely to capture these details.
Where should I place the darkest shadows?
Darkest shadows will typically be on the side opposite the light source and directly beneath the crate where it meets the ground.
How can I keep the perspective accurate?
Use light guidelines to ensure the angles of the crate's edges are consistent. Check often to make sure the sides remain proportional.
More drawing lessons
Earlier lessons come with Pro.


Get a new drawing exercise every morning, free that day. We email you when it is up.
Subscribe to Draw Daily →