What you'll learn
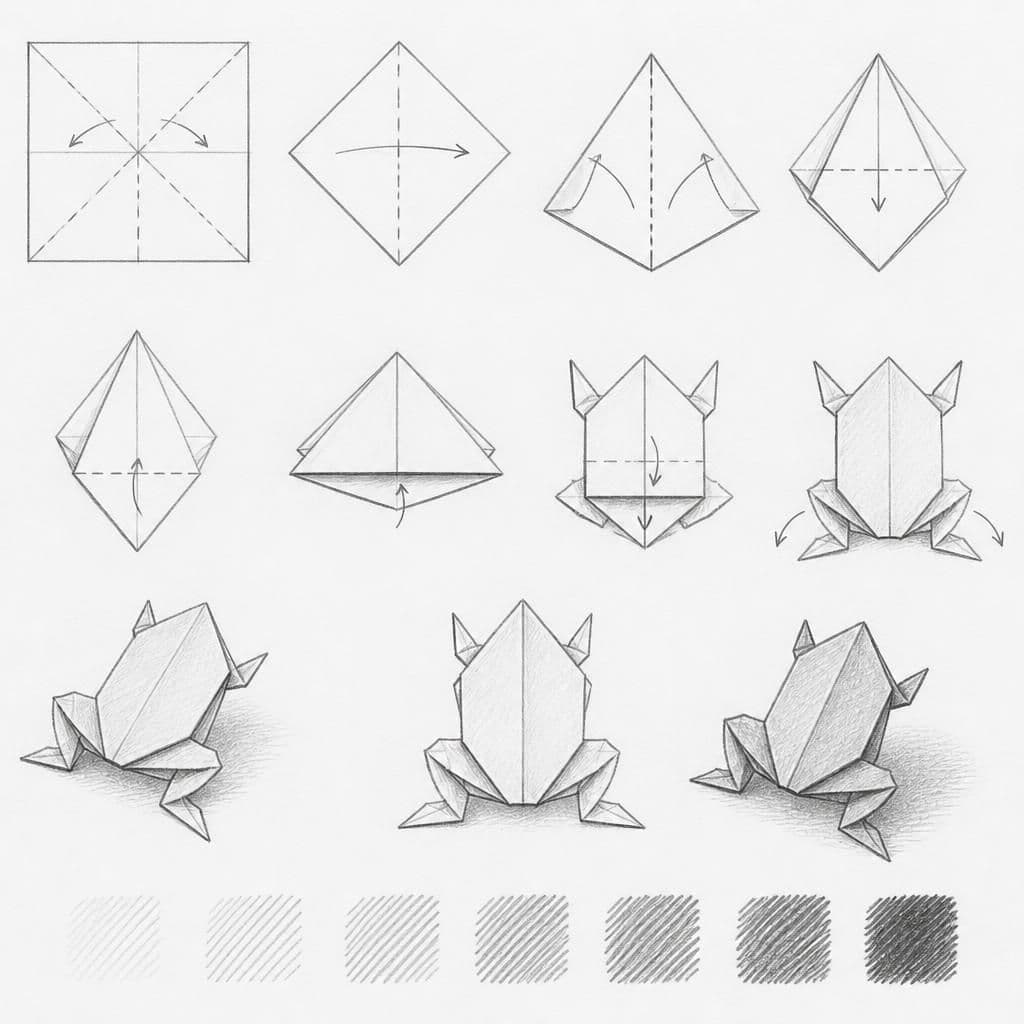
Drawing an origami frog provides an opportunity to practice shading the flat surfaces and understanding the way light interacts with folded paper edges. This subject helps beginners learn how to create depth with simple hatching techniques.
What you'll need
Step-by-step: how to draw origami frog
Begin by lightly sketching the outline of the origami frog, paying attention to the proportions of its body and limbs.
Identify the direction of your light source and lightly pencil in where the shadows fall on the frog.
Start hatching the shaded areas, using parallel lines. Adjust the density of the lines to vary the shading according to the light intensity.
Refine the edges of the frog, adding more detailed hatching to emphasize the folds and create a sense of volume.
Review the drawing, deepening the shadows with additional hatching where necessary to enhance the contrast between light and shadow.
Before you start: what to look at
Examine the direction and intensity of light on the origami frog. Notice how the shadows fall across the folds, and pay attention to the angles and lengths of these shadows. Look for highlights on the edges where the light is strongest.
Pro tips for drawing origami frog
Common mistakes drawing origami frog
Self-evaluation checklist
Check that your hatching creates a three-dimensional look by comparing the light and dark areas. Ensure that the values transition smoothly across the folded surfaces, enhancing the frog's form.
Frequently asked questions
How do I know where to start shading on an origami frog?
Begin by identifying the main light source direction. Shade where the light reaches less, such as the under-folds and areas opposite the light.
What pencil should I use for hatching?
A 2B pencil works well for hatching because it creates nice, dark lines without being too soft.
Should I draw the outlines first?
Yes, sketch the basic shape lightly at first so you have a guide to follow when adding values and hatching.
More drawing lessons




Get a new drawing lesson delivered to your inbox every morning, free.
Subscribe to Draw Daily →