What you'll learn
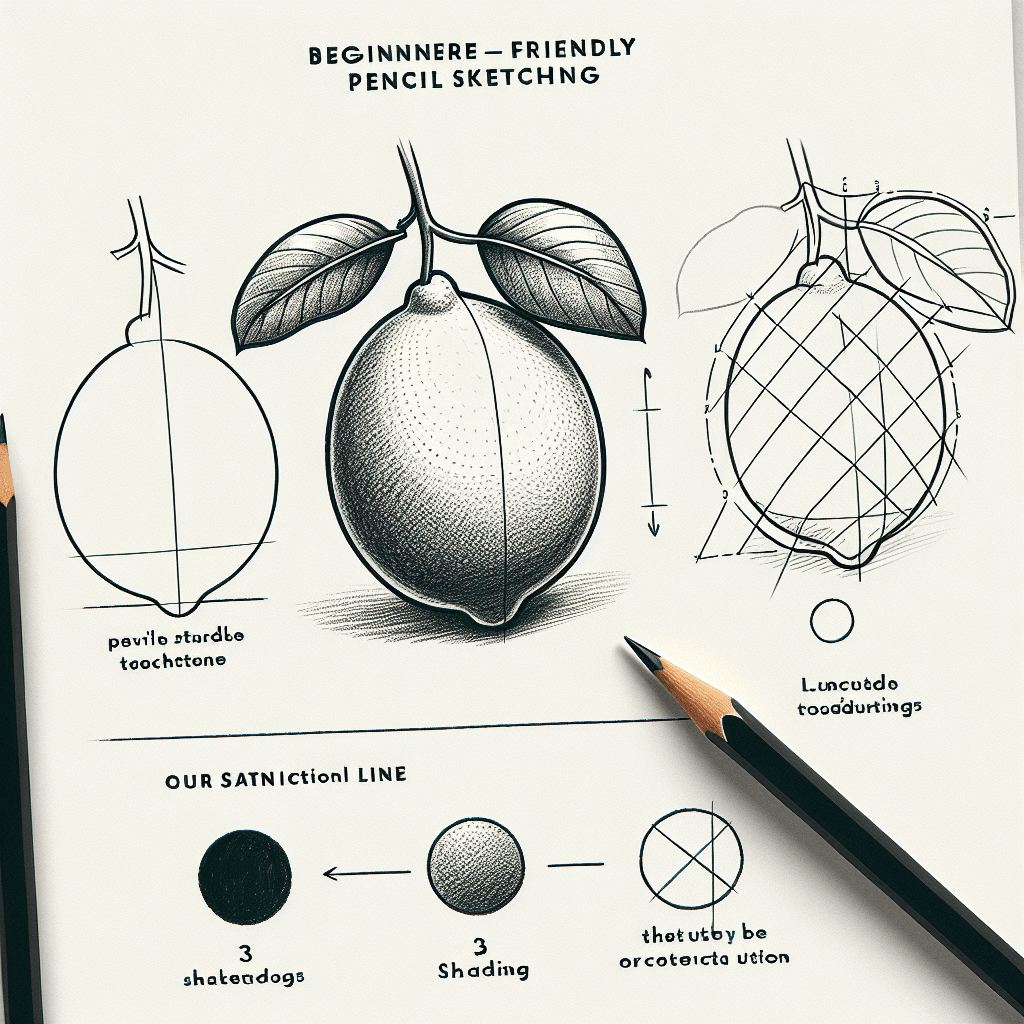
Drawing a lemon will help you practice shading techniques, given its textured surface and natural curvature. Focusing on shadow and light will enhance the three-dimensional quality of your sketch, aiding in depth perception.
What you'll need
Step-by-step: how to draw lemon
Step 1: Sketch the basic oval shape of the lemon lightly.
Step 2: Add the small 'nubs' at each end of the lemon to capture its unique shape.
Step 3: Begin adding texture with light shading to indicate the dimpled skin.
Step 4: Identify the light source and add deeper shadows on the opposite side.
Step 5: Refine the drawing by adjusting the contrast between light and shadow areas.
Before you start: what to look at
Examine the lemon's overall shape and notice that it's not a perfect oval. The slight bulges near the 'nubs' create subtle curves. Observe where the light naturally highlights the surface and how it interacts with the dimples, casting tiny shadows and forming a gradient from light to dark.
Pro tips for drawing lemon
Common mistakes drawing lemon
Self-evaluation checklist
Ensure the lemon appears three-dimensional by evaluating the contrast between the highlights and shadows. Check if the texture resembles the characteristic dimples of a lemon's skin.
Frequently asked questions
How do I capture the texture of the lemon skin effectively?
Use short, light strokes to suggest the dimples. Vary the pressure to create subtle gradients of light and shadow across the surface. Observing the surface texture in detail helps maintain the characteristic look.
What is the best way to determine the light source for shading?
Identify the brightest area on the lemon where the light hits directly. From that point, shadows will be on the opposite side. This will help establish where to place the darker areas and achieve a more three-dimensional effect.
Why does my lemon look flat even after shading?
Check the contrast between your highlights and shadows. Increasing the difference can enhance depth. Ensure the shadows follow the curve of the lemon, wrapping around it to emphasize roundness.
More drawing lessons


Get a new drawing lesson delivered to your inbox every morning, free.
Subscribe to Draw Daily →