What you'll learn
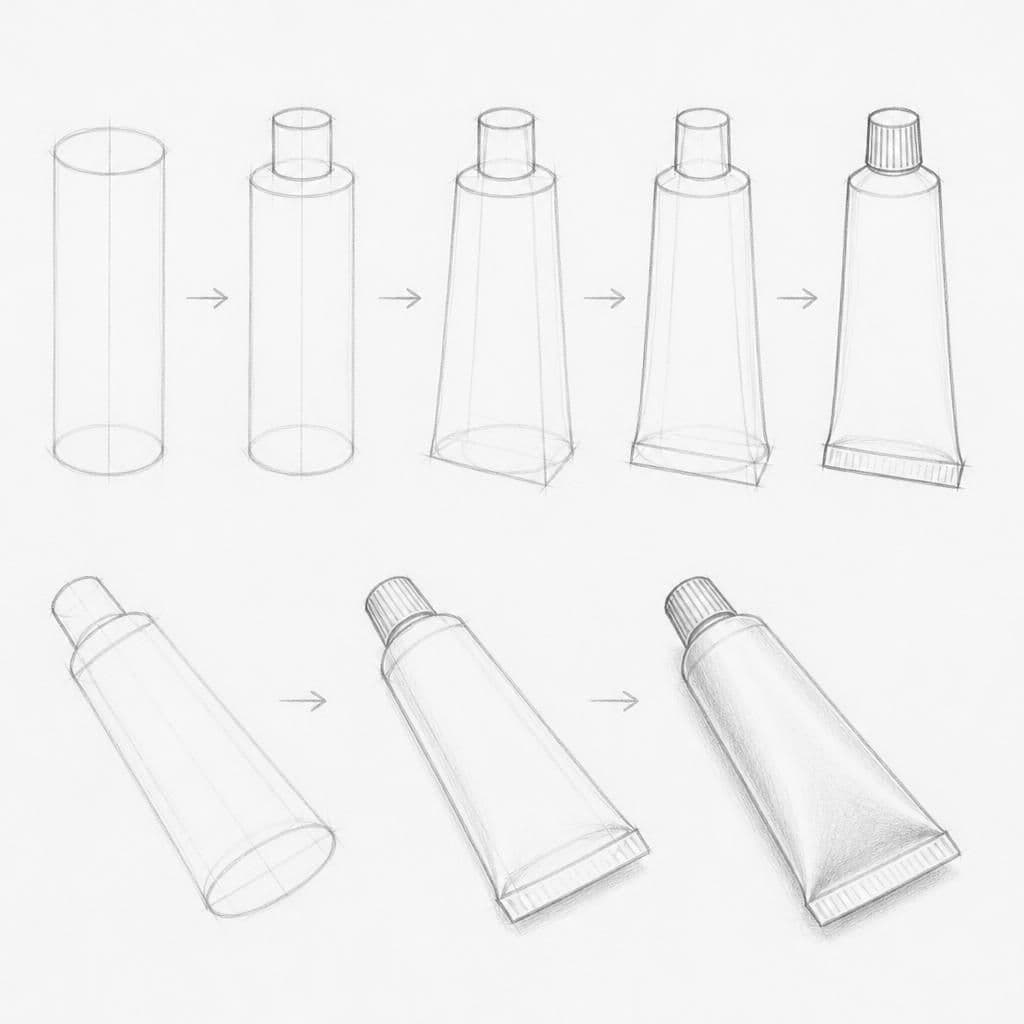
Drawing a toothpaste tube helps beginners understand how to break down an object into cylinders and rectangles, which are fundamental shapes in construction. This exercise will improve your ability to visualize and draw three-dimensional forms on a two-dimensional surface.
What you'll need
Step-by-step: how to draw toothpaste tube
Start by drawing a long, narrow rectangle for the main body of the tube.
Add a cylinder at one end of the rectangle to represent the tube cap.
Sketch the folded end of the tube with a slightly curved line to show where it tapers.
Outline the details such as the screw threads on the cap and brand label on the tube.
Add shading to suggest the tube's roundness and the light source direction.
Before you start: what to look at
Before drawing, note the cylindrical shape of the cap and the rectangular flow of the tube's body. Look at where natural light creates highlights and shadows on the tube.
Pro tips for drawing toothpaste tube
Common mistakes drawing toothpaste tube
Self-evaluation checklist
Check if the tube's body and cap look proportional and if the shading accurately represents the light source. Ensure the tube appears three-dimensional.
Frequently asked questions
How do I make the tube look less flat?
Focus on using shading to define the tube's round shape. Highlight the areas where light naturally falls and darken where shadows occur.
How can I accurately draw the screw threads on the cap?
Use short, parallel lines on the cap's edge to mimic the texture of screw threads. They should curve slightly to follow the cylindrical shape.
What if my tube looks too stiff?
Try slightly curving the tube or adding a small bend to make it appear more natural, as if it’s been squeezed or used.
More drawing lessons
Get a new drawing lesson delivered to your inbox every morning, free.
Subscribe to Draw Daily →