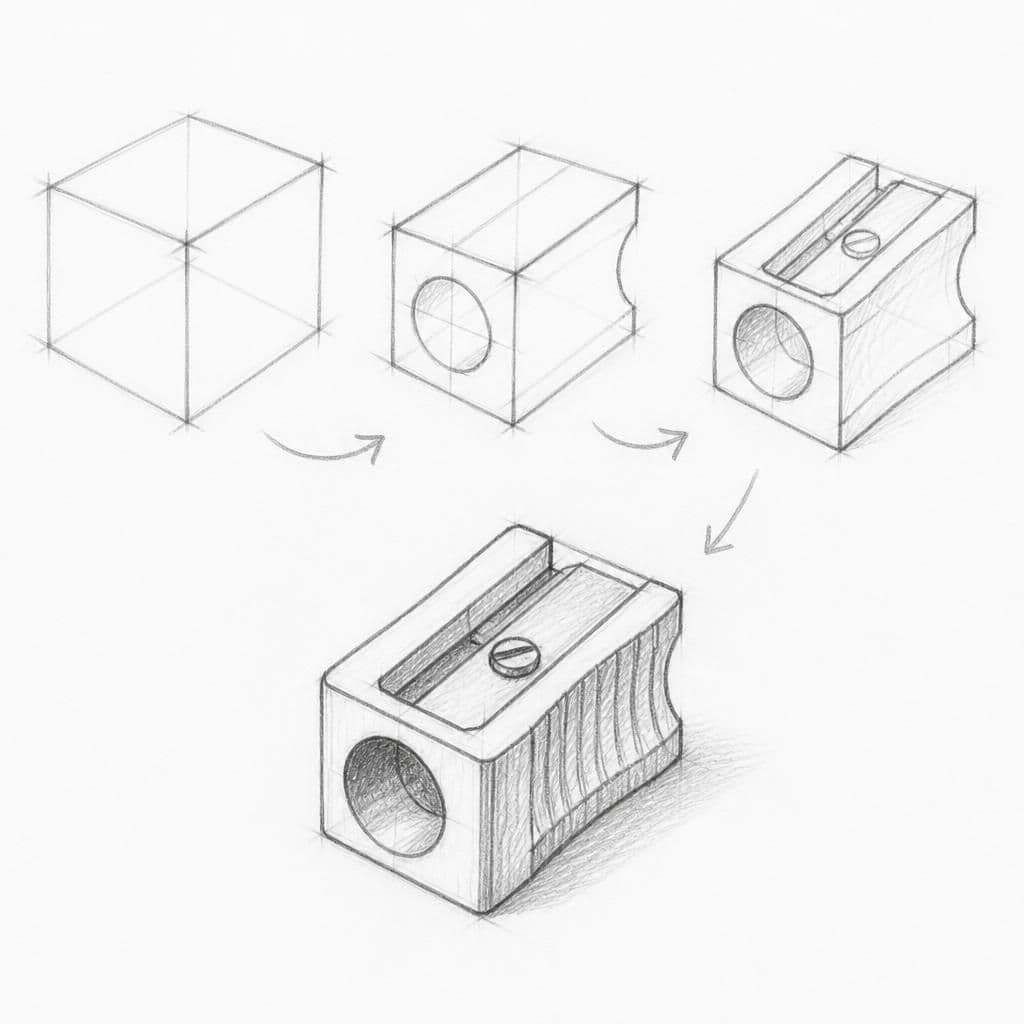
What you'll learn
This exercise develops the skill of breaking an object into its basic geometric shapes, a crucial part of construction. By focusing on a pencil sharpener, you will learn to identify cubes, rectangles, and cylinders in everyday objects.
What you'll need
Step-by-step: how to draw pencil sharpener
Start by drawing a rectangular prism to represent the body of the pencil sharpener. Keep the lines light.
Identify the blade section as a smaller rectangle on one of the prism's faces and sketch it in.
Add the cylinder on the side (or top, depending on the sharpener model) where the pencil is inserted. This will help you practice combining different shapes.
Lastly, refine the shapes with details such as the blade, screw, and any brand markings. Darken the lines you want to keep.
Pro tips for drawing pencil sharpener
Self-evaluation checklist
Check that the basic shapes align with the actual object and that proportions are correct. Ensure details fit well within the primary shapes without distorting the overall structure.
Frequently asked questions
How long does this drawing exercise take?
The full pencil sharpener exercise is designed to fit in about 10 minutes of focused practice, which is one of the reasons it works as a daily habit.
Do I need any prior drawing experience?
No. This lesson is aimed at beginner artists and assumes only a pencil, paper, and willingness to observe.
What skill does this lesson target?
The focus is construction. Repeating similar exercises over time is how this skill becomes second nature.
More drawing lessons
Get a new drawing lesson delivered to your inbox every morning, free.
Subscribe to Draw Daily →