What you'll learn
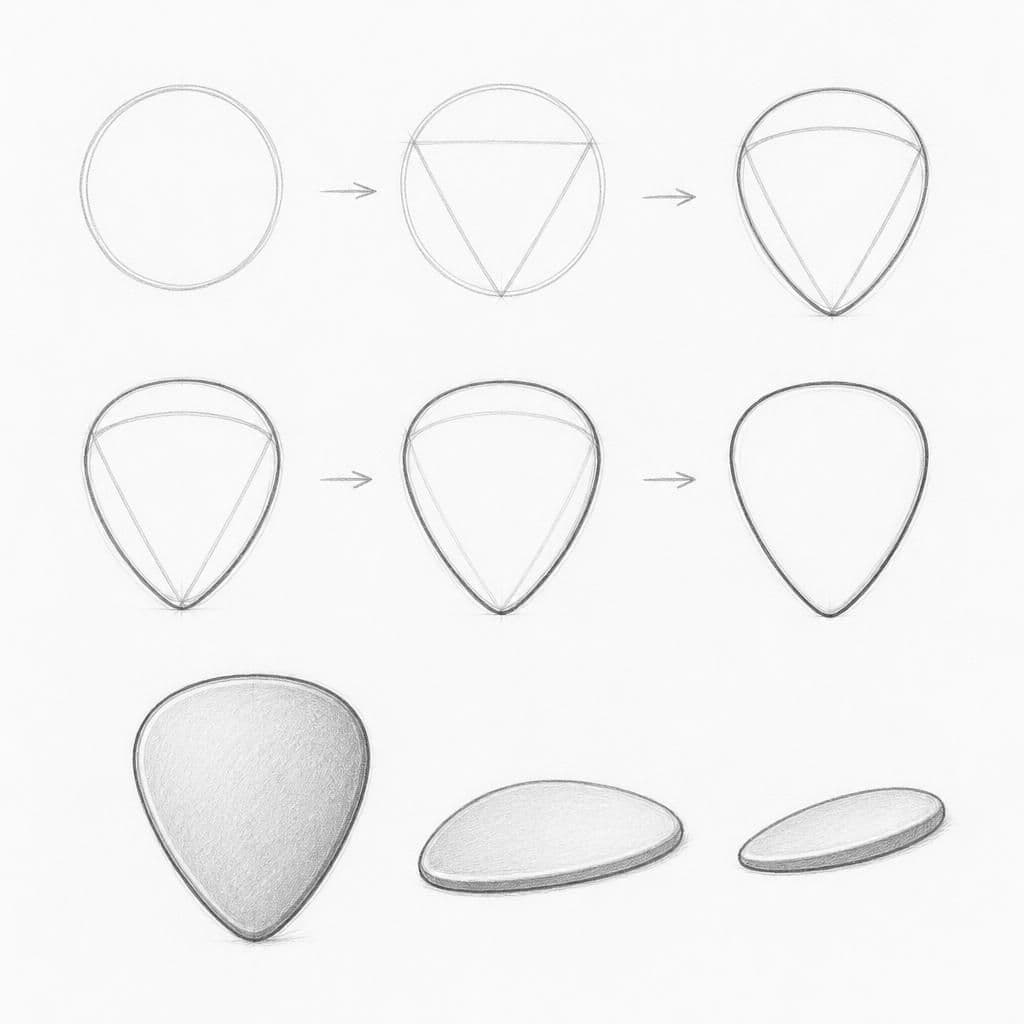
Drawing a guitar pick allows you to practice breaking down a simple object into basic geometric shapes, focusing on its curves and angles. This exercise will help you understand how to layer shapes to form a coherent structure.
What you'll need
Step-by-step: how to draw guitar pick
Start by drawing an equilateral triangle with rounded corners at the top. This forms the basic outline of the pick.
Add a guide circle inside the triangle to help with symmetry and proportion.
Sketch a smaller triangle within the guide circle to define the pick's edges and thickness.
Use curved lines to soften the sharp angles of the triangles, refining the pick's shape.
Erase any unnecessary guide lines and add detail such as a logo or texture for realism.
Before you start: what to look at
Look closely at the pick's edges and notice how light reflects off them. Examine the uniform curve from one end of the pick to the other, noting any minor texture or logo placement.
Pro tips for drawing guitar pick
Common mistakes drawing guitar pick
Self-evaluation checklist
Check if your guitar pick sketch maintains symmetrical curves and if the thickness is consistent throughout.
Frequently asked questions
Why does my guitar pick look flat?
Make sure you are differentiating the edge and the surface by using varied line weights and shading to convey depth.
How can I ensure symmetry in my drawing?
Use guide lines and lightly sketch a central axis to compare both sides during the construction phase.
What if the logo doesn't fit on the pick?
Adjust the size of the pick or the logo while sketching. Start with a simple version of the logo and add details gradually.
More drawing lessons
Get a new drawing lesson delivered to your inbox every morning, free.
Subscribe to Draw Daily →