What you'll learn
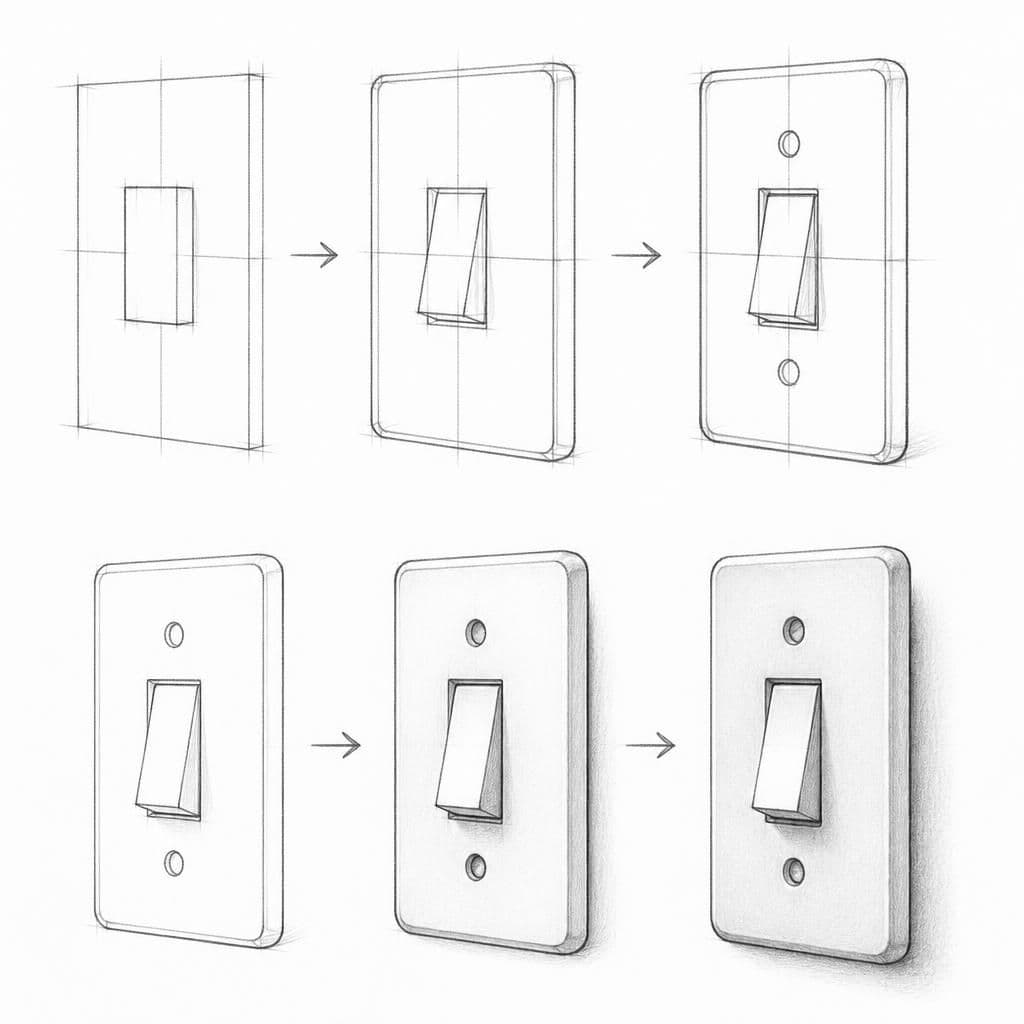
This exercise involves breaking down a light switch into simple shapes like rectangles and cylinders. This helps beginners practice seeing everyday objects as a combination of basic forms.
What you'll need
Step-by-step: how to draw light switch
Start by sketching a large rectangle to represent the main body of the light switch.
Inside this rectangle, draw a smaller rectangle to depict the switch itself.
Add small circles or oval shapes for any screws or decorative elements.
Refine the edges of your main shapes to add a slight perspective, giving the switch depth.
Erase unnecessary lines and add minimal shading to indicate lighting and depth.
Pro tips for drawing light switch
Self-evaluation checklist
Check that the proportions between the switch and plate are accurate. Ensure the perspective gives a sense of depth and the lines are clean.
Frequently asked questions
How long does this drawing exercise take?
The full light switch exercise is designed to fit in about 15 minutes of focused practice, which is one of the reasons it works as a daily habit.
Do I need any prior drawing experience?
No. This lesson is aimed at beginner artists and assumes only a pencil, paper, and willingness to observe.
What skill does this lesson target?
The focus is construction. Repeating similar exercises over time is how this skill becomes second nature.
More drawing lessons
Get a new drawing lesson delivered to your inbox every morning, free.
Subscribe to Draw Daily →