What you'll learn
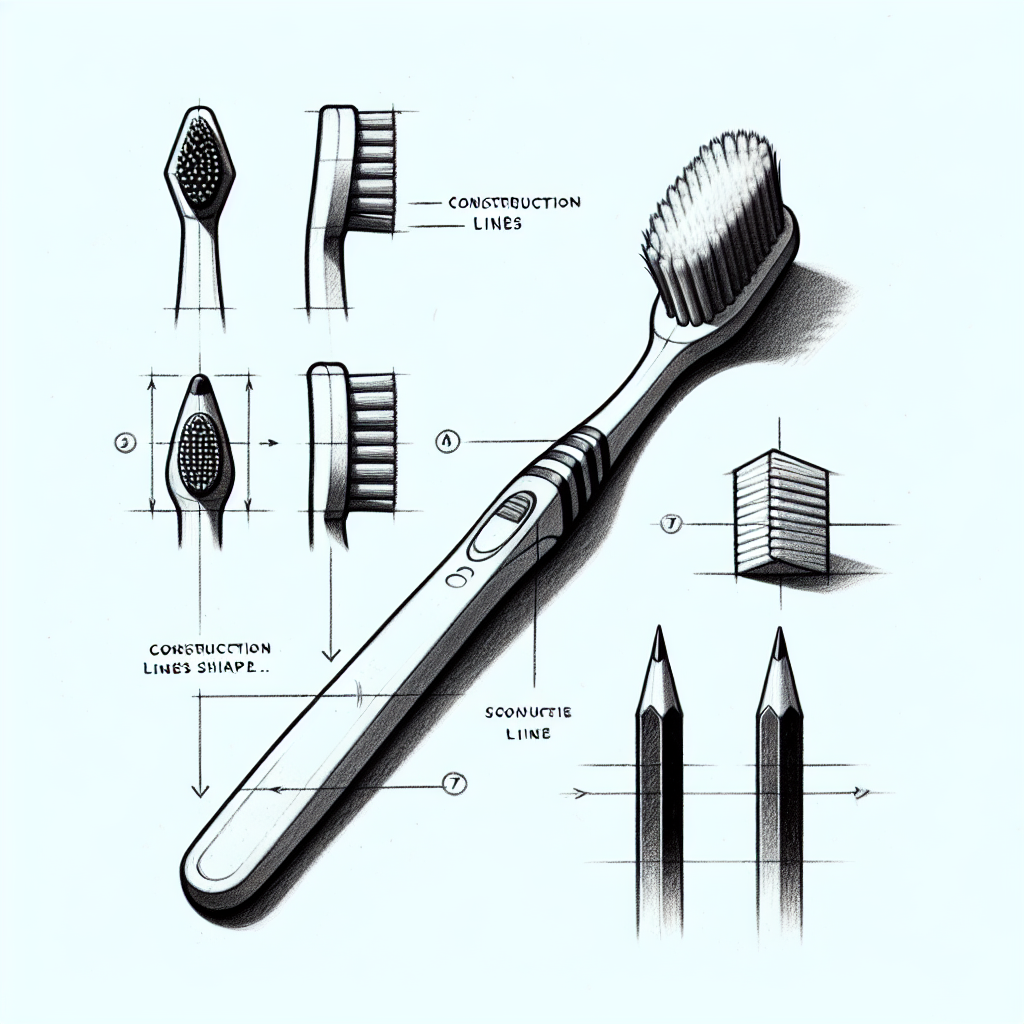
Drawing a toothbrush helps beginners practice breaking down a recognizable object into simple geometric shapes. This exercise focuses on understanding proportions and connecting these shapes to form a complete object.
What you'll need
Step-by-step: how to draw toothbrush
Start by drawing a long, narrow rectangle for the handle of the toothbrush. Ensure the proportions look correct for a handle.
Add a smaller rectangle at one end of the handle to represent the head of the toothbrush.
Draw a series of short, parallel lines extending from the smaller rectangle to represent the bristles. Focus on keeping these lines evenly spaced.
Refine the shape of the handle by adding a slight curve or taper towards one end to show its ergonomic design.
Add details such as a rubber grip texture on the handle by drawing small ovals or lines, and refine the shape of the bristles for a more realistic appearance.
Pro tips for drawing toothbrush
Self-evaluation checklist
Evaluate your sketch by checking if the toothbrush's proportions look natural and whether the handle and head connect seamlessly. Ensure the bristles appear evenly spaced and textured.
Frequently asked questions
How long does this drawing exercise take?
The full toothbrush exercise is designed to fit in about 15 minutes of focused practice — one of the reasons it works as a daily habit.
Do I need any prior drawing experience?
No. This lesson is aimed at beginner artists and assumes only a pencil, paper, and willingness to observe.
What skill does this lesson target?
The focus is construction. Repeating similar exercises over time is how this skill becomes second nature.
More drawing lessons


Get a new drawing lesson delivered to your inbox every morning — free.
Subscribe to Draw Daily →