What you'll learn
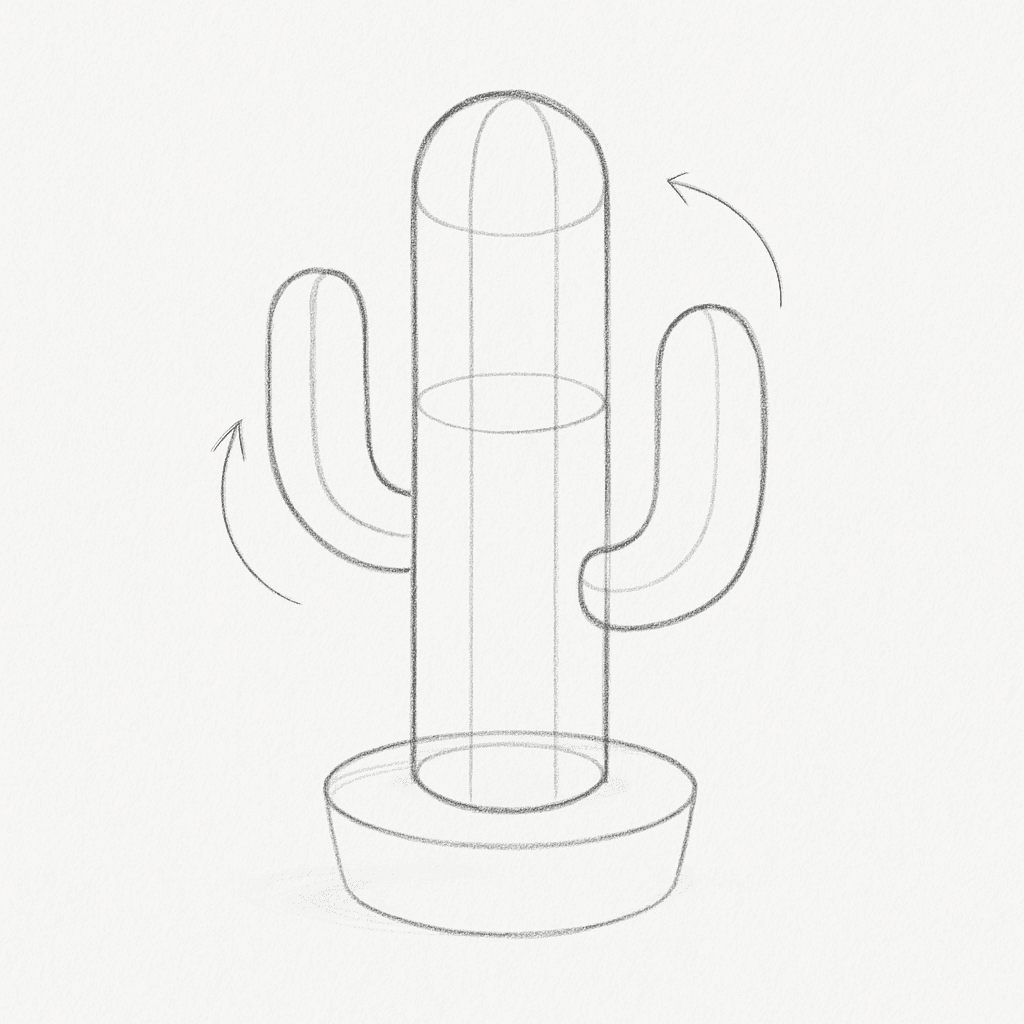
This exercise uses a cactus to practice construction by breaking it down into simple geometric forms like cylinders and spheres, which helps beginners understand how to build complex shapes from basic ones.
What you'll need
Step-by-step: how to draw cactus
Begin by drawing a large oval or cylinder to represent the main body of the cactus.
Add smaller ovals or cylindrical shapes to create the cactus arms, keeping them proportional to the main body.
Sketch in spheres or ellipses on the tops and sides of the arms to represent the cactus's rounded nodes.
Using these basic shapes as a guide, refine the outline of the cactus, emphasizing the natural, irregular contours.
Add simple details like small lines to indicate spines and any surface texture.
Before you start: what to look at
Examine how the light creates highlights and shadows on the cactus's surface, especially on its rounded nodes. Notice the subtle curves and angles where the arms of the cactus emerge from the main body. Observe the texture variations, like the small ridges and grooves, which can affect how light interacts with the surface.
Pro tips for drawing cactus
Common mistakes drawing cactus
Self-evaluation checklist
Check that the main body and arms of your cactus maintain consistent proportions and that the basic shapes are clearly represented in the final sketch.
Frequently asked questions
How do I capture the texture of a cactus in my drawing?
To depict the texture, use short, light strokes to suggest the spines. Focus on creating small, repeated patterns that mimic the cactus's surface. Consider using varied line weights to add depth and contrast.
What are some tips for drawing the cactus in perspective?
Begin by visualizing the cactus as a series of overlapping cylinders and spheres. Draw the base shapes with foreshortening in mind, adjusting the ellipses at the top of each cylinder to reflect the perspective. Use guidelines to maintain consistent angles and proportions.
How should I approach drawing the cactus arms in relation to the main body?
Keep the arms proportional by observing their relative size compared to the main body. Sketch them with smooth, natural curves, ensuring they connect seamlessly at the junction points. Pay attention to the angle and direction each arm grows, reflecting the cactus's unique growth pattern.
More drawing lessons
Get a new drawing lesson delivered to your inbox every morning, free.
Subscribe to Draw Daily →