What you'll learn
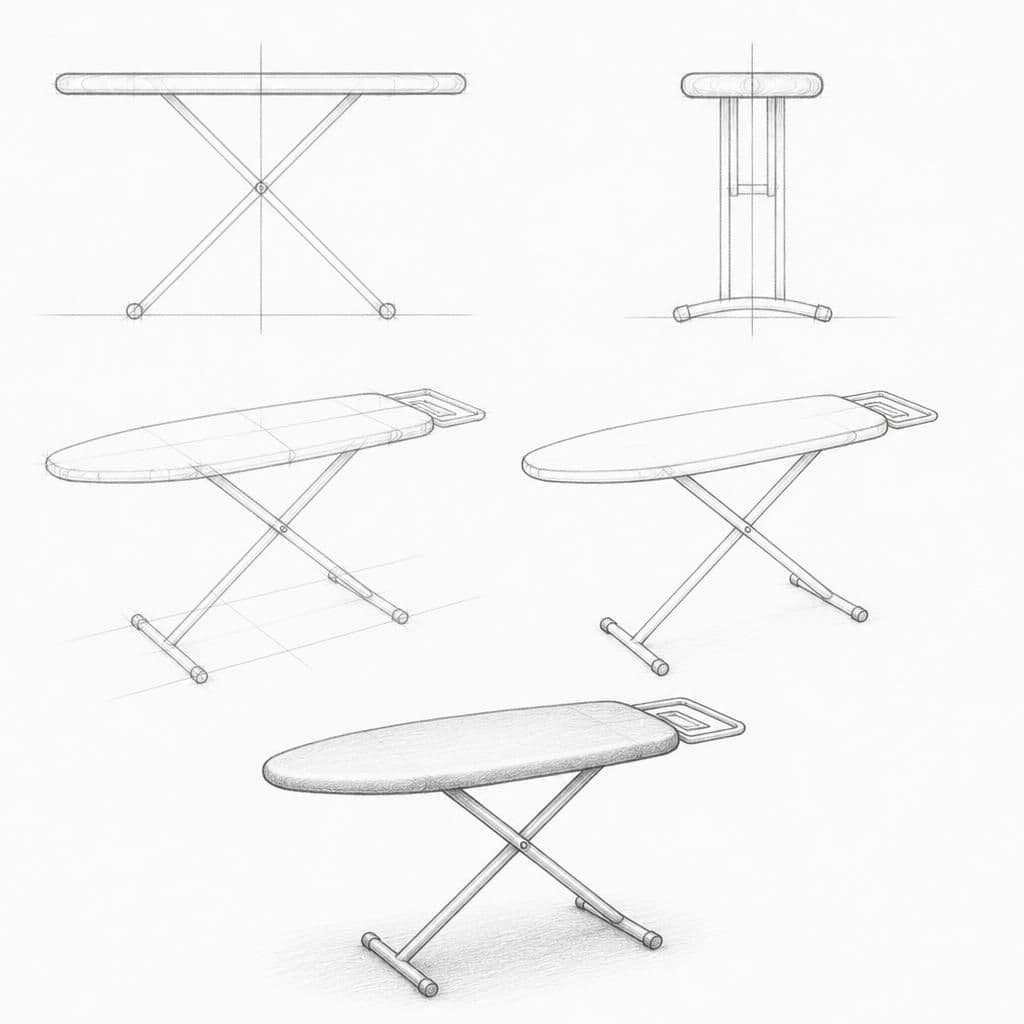
An ironing board offers a great opportunity to practice breaking down an object into primary geometric shapes like rectangles and triangles, while also focusing on symmetry and proportion. Its simple and elongated form allows for study of repetition and alignment in construction.
What you'll need
Step-by-step: how to draw ironing board
Start by sketching a long, narrow rectangle to represent the main board surface, ensuring it is symmetrical along its length.
Add triangles at both ends of the rectangle to capture the narrowing edges of the board.
Draw the legs using straight lines, making sure they are evenly spaced and maintain symmetry to support the board.
Sketch circles where the legs intersect with the board and the floor to represent joints and wheels, adding volume to the structure.
Add details such as the fabric pattern and handle by lightly sketching over the constructed base, maintaining the initial proportions.
Pro tips for drawing ironing board
Self-evaluation checklist
Evaluate your sketch by checking if the ironing board looks balanced and symmetrical. Ensure the legs and board are in proportion, and details like fabric patterns enhance the three-dimensional feel without overpowering the simplicity of the structure.
Frequently asked questions
How long does this drawing exercise take?
The full ironing board exercise is designed to fit in about 15 minutes of focused practice, which is one of the reasons it works as a daily habit.
Do I need any prior drawing experience?
No. This lesson is aimed at intermediate artists and assumes only a pencil, paper, and willingness to observe.
What skill does this lesson target?
The focus is construction. Repeating similar exercises over time is how this skill becomes second nature.
More drawing lessons

Get a new drawing lesson delivered to your inbox every morning, free.
Subscribe to Draw Daily →