What you'll learn
A corkscrew combines cylindrical and spiral forms, challenging you to construct with precision. Intermediate artists can explore the balance between rigid and curved elements, enhancing their understanding of complex structures.
What you'll need
Step-by-step: how to draw corkscrew
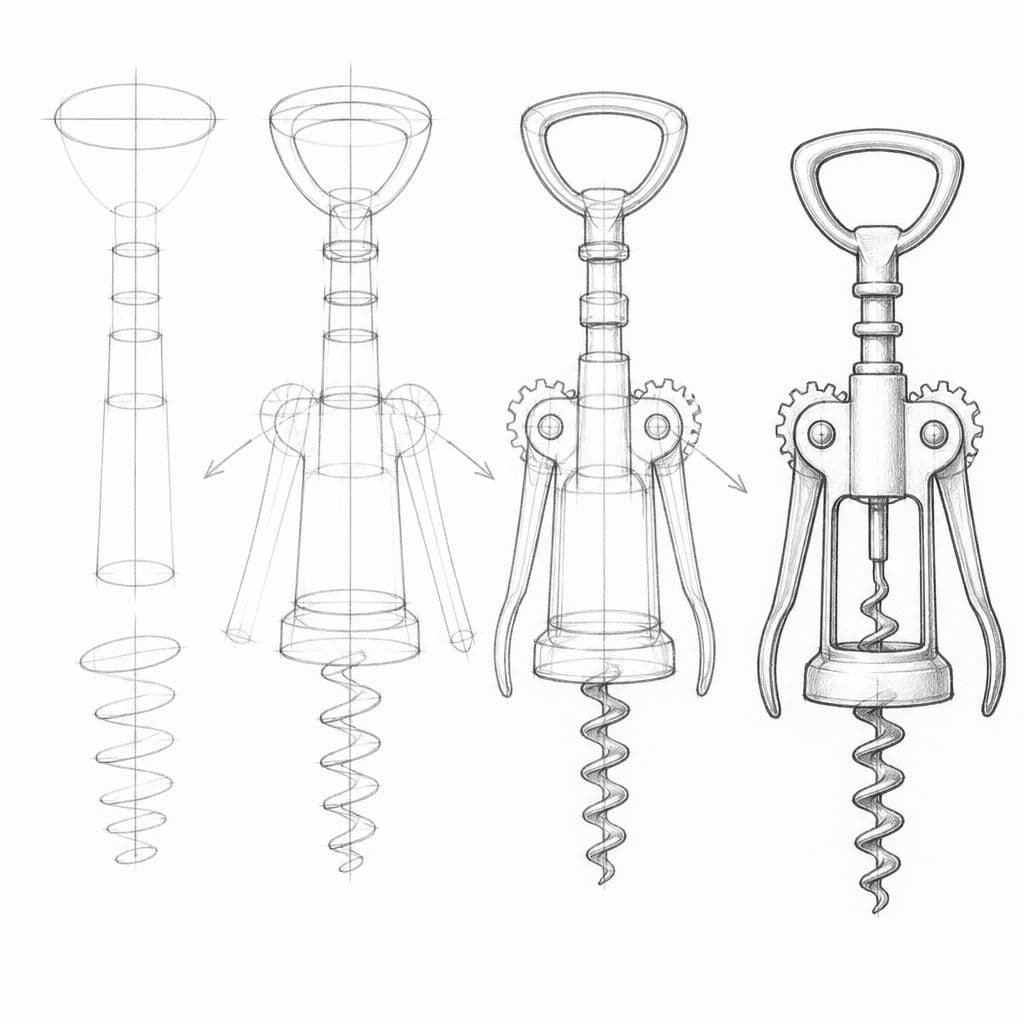
Start by drawing the main cylindrical body of the corkscrew as two concentric ellipses and connect them with straight lines.
Add the handle as a horizontal cylindrical shape, positioning it above the main body centered.
Sketch the spiral worm using a tapered elongated cone, wrapping it around the bottom part of the main body.
Lightly draw guidelines to position the helix accurately, making sure the spirals appear consistent.
Refine the sketch by adding details like the screw's thread and the texture on the handle, erasing unnecessary guidelines.
Pro tips for drawing corkscrew
Self-evaluation checklist
Check that the cylindrical parts are well proportioned and the spiral follows the helix naturally. Ensure the drawing conveys a sense of volume and solidity.
Frequently asked questions
How long does this drawing exercise take?
The full corkscrew exercise is designed to fit in about 15 minutes of focused practice, which is one of the reasons it works as a daily habit.
Do I need any prior drawing experience?
No. This lesson is aimed at intermediate artists and assumes only a pencil, paper, and willingness to observe.
What skill does this lesson target?
The focus is construction. Repeating similar exercises over time is how this skill becomes second nature.
More drawing lessons
Get a new drawing lesson delivered to your inbox every morning, free.
Subscribe to Draw Daily →