What you'll learn
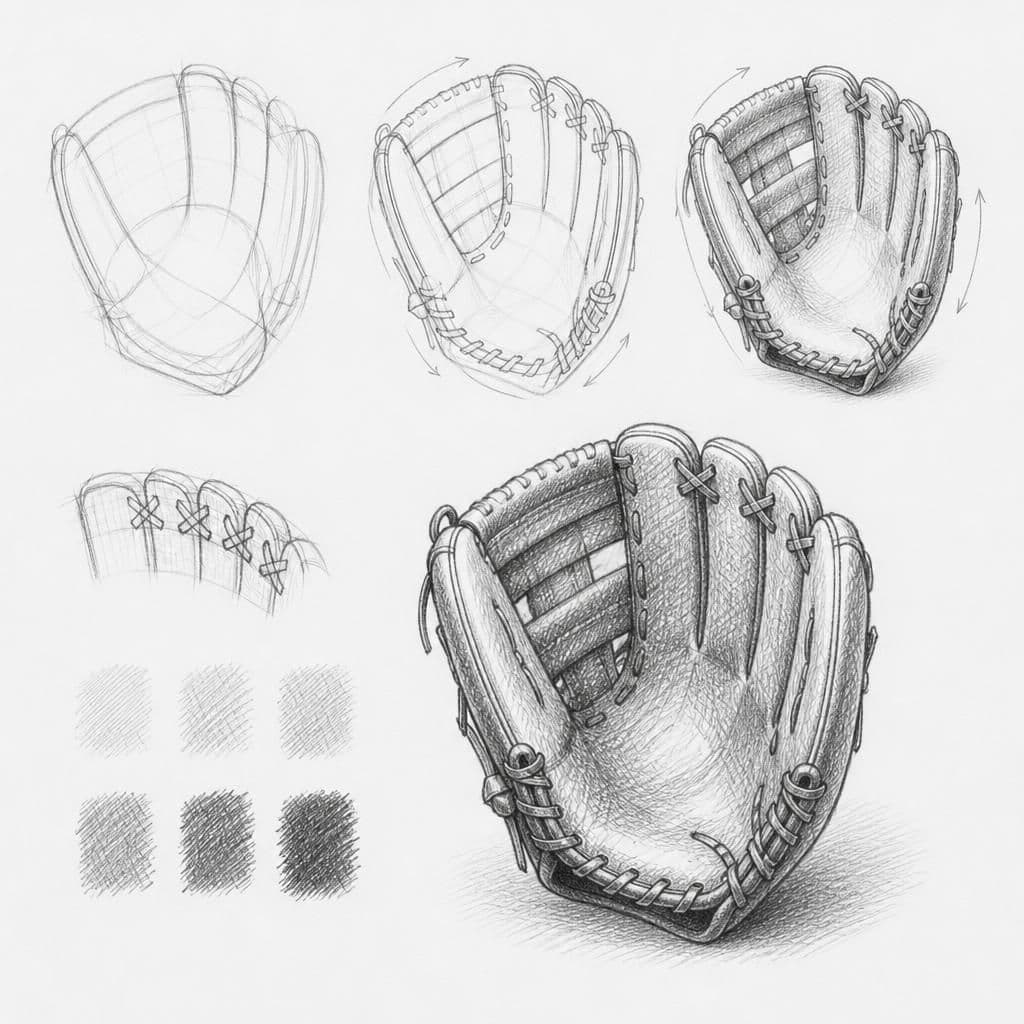
Drawing a baseball mitt allows you to explore complex textures and shading. The overlapping leather and stitching provide an opportunity to practice cross-hatching for depth and value contrast.
What you'll need
Step-by-step: how to draw baseball mitt
Examine the mitt's overall shape and draw a basic outline.
Notice the light source and shade the main body using broad strokes.
Use cross-hatching to show the mitt's padded texture and depth.
Add finer details by emphasizing the stitching and seams with tighter hatching.
Refine your shading by adjusting the contrast between light and shadow areas.
Before you start: what to look at
Before drawing, focus on the mitt's contour lines and how they create volume. Notice where the light naturally highlights the leather and how shadows form around the webbing and fingers.
Pro tips for drawing baseball mitt
Common mistakes drawing baseball mitt
Self-evaluation checklist
Check if the mitt feels three-dimensional with convincing shadows and highlights. Ensure the cross-hatching adds to the texture without muddling the drawing.
Frequently asked questions
How do I capture the mitt's texture?
Use cross-hatching in varying directions to mimic the leather's texture. Pay attention to areas where the texture is more pronounced, like the palm and fingers.
How should I approach shading the webbing?
Layer your hatching gradually and focus on the shadow that the webbing casts on the mitt. This will create a sense of depth.
What should I do if my cross-hatching looks messy?
Slow down your strokes and ensure they follow the curves of the mitt. Clean up any areas with a kneaded eraser to refine the details.
More drawing lessons

Get a new drawing lesson delivered to your inbox every morning, free.
Subscribe to Draw Daily →