What you'll learn
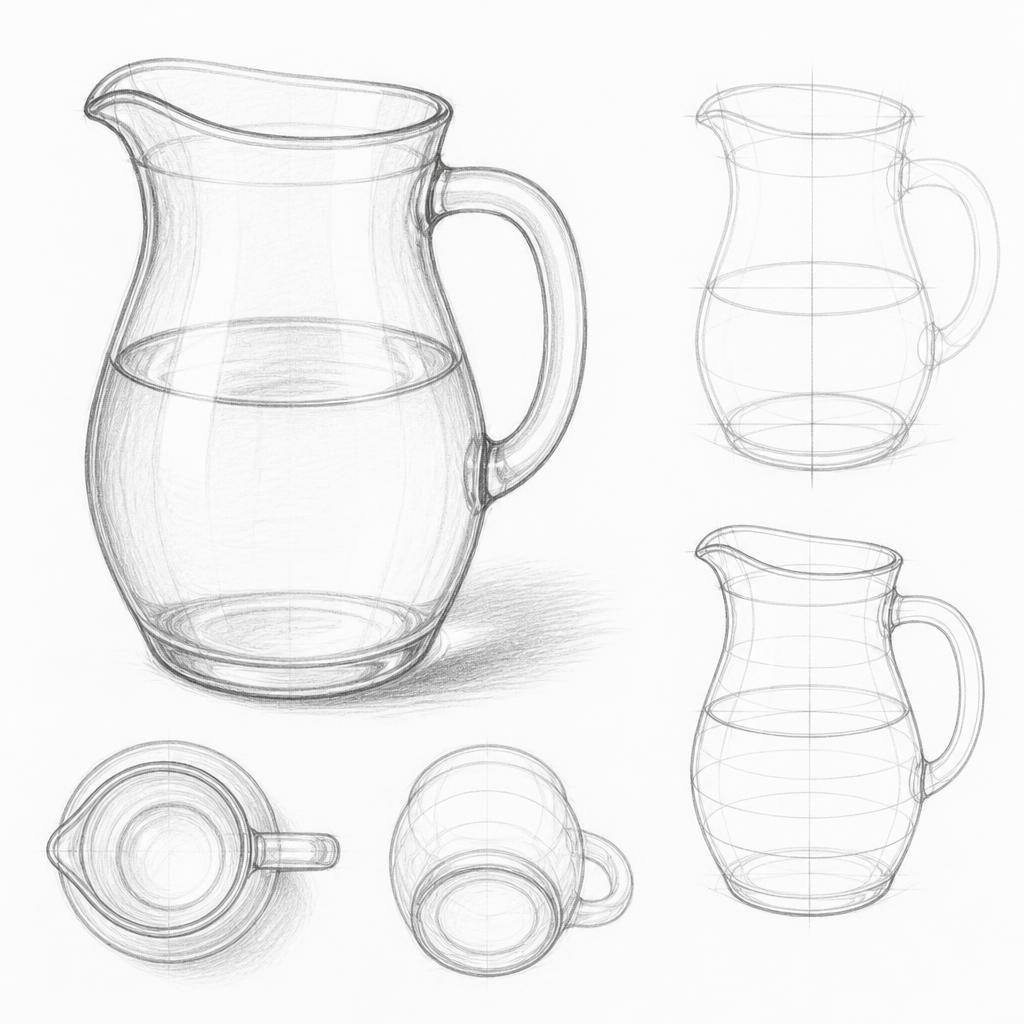
A water pitcher presents a compelling challenge with its curvilinear form and distinct spout. Capturing its proportion and volume will hone your ability to represent rounded surfaces and asymmetrical shapes.
What you'll need
Step-by-step: how to draw water pitcher
Start with a light sketch of a vertical axis to help place the pitcher symmetrically.
Outline the general shape of the pitcher starting from the base, defining the oval or circular bottom.
Draw the body of the pitcher, paying attention to the curvature as it tapers towards the neck.
Sketch the spout, ensuring it aligns properly with the body, and take note of how it protrudes forward.
Add the handle, making sure to capture its attachment points and curvature relative to the body.
Refine the drawing by emphasizing contours, adjusting proportions, and adding any details such as decorative elements or seams.
Before you start: what to look at
Notice the way the base of the pitcher curves up to meet the body. Observe the slant and proportions of the spout compared to the main body. Pay attention to how the handle curves and connects at both ends.
Pro tips for drawing water pitcher
Common mistakes drawing water pitcher
Self-evaluation checklist
Check if the pitcher looks balanced and if its proportions are consistent. Ensure the body reads as a three-dimensional form, not a flat shape.
Frequently asked questions
How do I ensure the spout looks correctly aligned?
Align the spout with the central axis of the pitcher. Use your pencil to measure the angles and spacing relative to the body to ensure it looks natural.
What if the handle looks awkward?
Check the attachment points of the handle and adjust the curvature. The handle should follow the natural curves of the pitcher and not appear stiff.
How can I avoid the pitcher looking flat?
Focus on depicting the curves and contours that define its volume. Use shading or hatching to enhance the sense of depth on rounded surfaces.
More drawing lessons
Earlier lessons come with Pro.

Get a new drawing exercise every morning, free that day. We email you when it is up.
Subscribe to Draw Daily →