What you'll learn
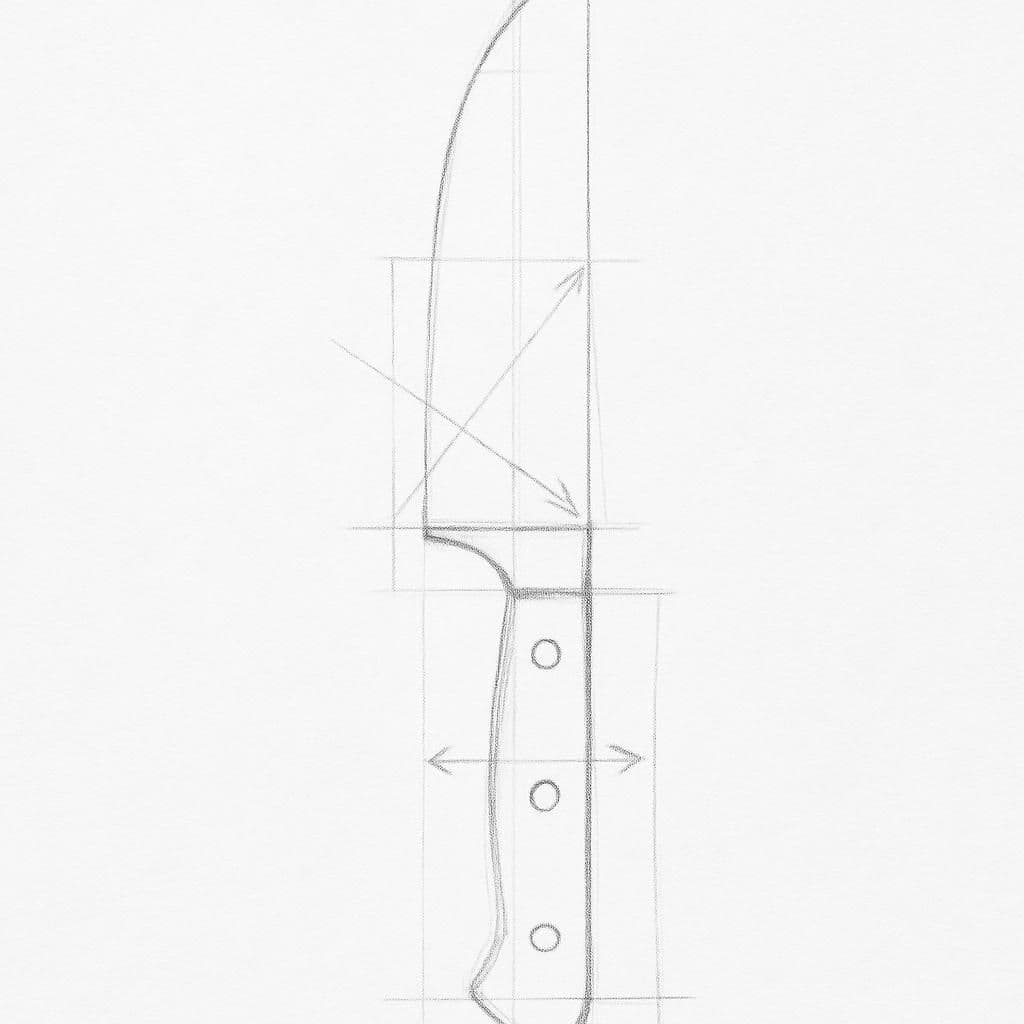
Capturing a kitchen knife helps refine proportion due to its distinct divisions between blade, bolster, and handle. The challenge lies in realistically rendering the flat versus curved surfaces to convey volume.
What you'll need
Step-by-step: how to draw kitchen knife
Start by sketching the overall outline of the knife, focusing on the relative lengths of the blade and handle.
Identify and draw the central ridge of the blade, ensuring it's properly aligned to give a sense of dimension.
Add the details of the handle, paying close attention to its thickness and how it attaches to the blade.
Refine the contours, using varied line weights to emphasize edges and create the illusion of volume.
Before you start: what to look at
Before drawing, observe the light reflecting off the blade and how it fades along the central ridge to highlight its sharpness and curve. Notice the distinct separation between the bolster and blade, as well as the handle's attachment point. Pay attention to the handle's curves and how shadows form around its edges for a sense of thickness.
Pro tips for drawing kitchen knife
Common mistakes drawing kitchen knife
Self-evaluation checklist
Check if the blade and handle proportions are correct and if the drawing communicates the three-dimensional volume effectively through contour lines.
Frequently asked questions
How do I capture the blade's reflective surface?
Focus on observing where light hits the blade directly and where it casts subtle shadows. Use light shading to indicate reflections and darker lines to define the blade's edges and central ridge.
Why does my handle look flat and unrealistic?
Ensure you're using varied line weights to convey depth and volume. Pay attention to how the handle curves and rounds at the edges, and use shading to emphasize these contours.
What perspective should I use for drawing the knife?
A side or slight three-quarter view works well to display the knife’s proportions and volume. This view helps show the blade's depth and the handle’s shape, making it easier to balance the composition.
More drawing lessons
Get a new drawing lesson delivered to your inbox every morning, free.
Subscribe to Draw Daily →