What you'll learn
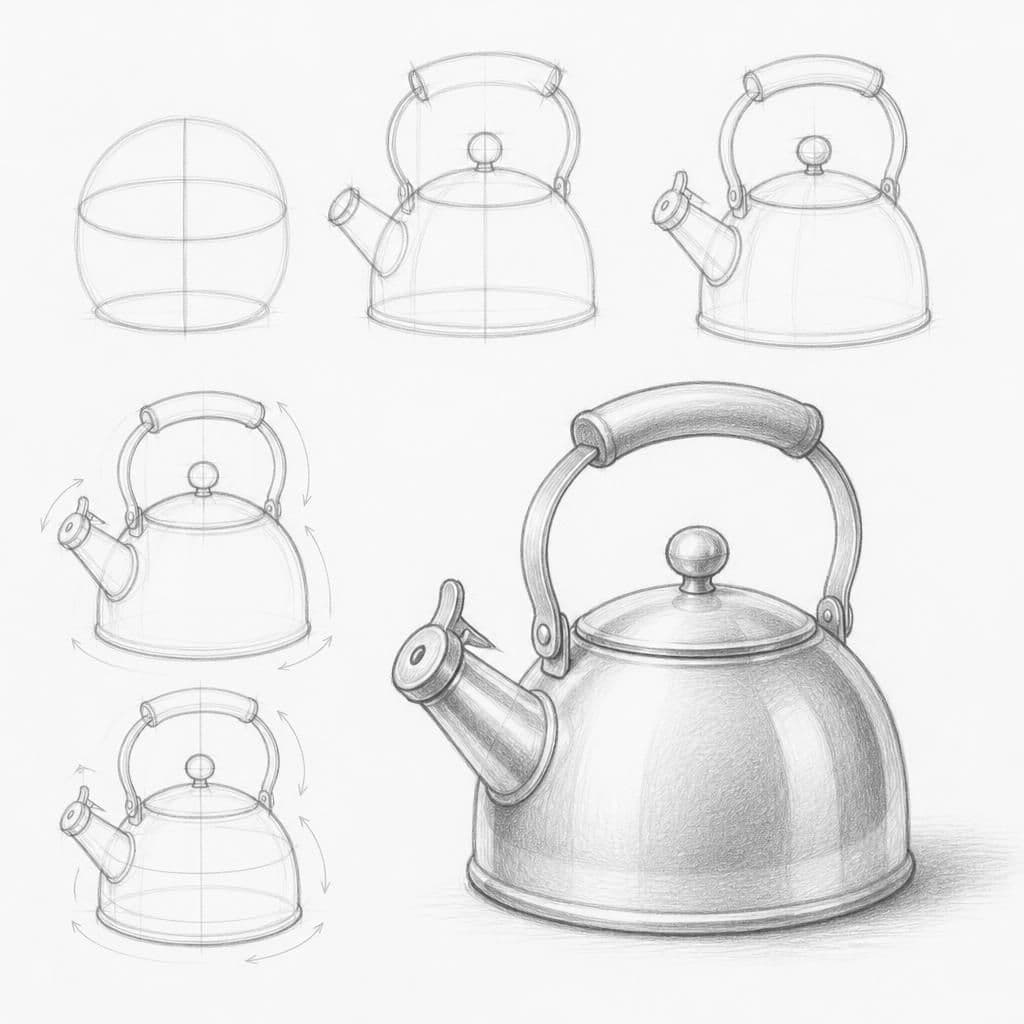
A tea kettle is a solid object with a combination of round and angular shapes, perfect for practicing observational drawing. It helps beginners notice subtle curves and proportions as they translate the three-dimensional object onto paper.
What you'll need
Step-by-step: how to draw tea kettle
Set the kettle in good lighting to see shadows and highlights.
Start by sketching the main body shape, focusing on its curves.
Add the spout and handle, noting their angles and connections to the body.
Look carefully at how the light hits the kettle and add shading accordingly.
Review your sketch, making sure the proportions and key features are accurate.
Before you start: what to look at
Notice the curve of the kettle's body and how the light creates highlights on its surface. Pay attention to the angles of the spout and handle as they attach to the main body. Observe how shadows are cast under the handle and spout.
Pro tips for drawing tea kettle
Common mistakes drawing tea kettle
Self-evaluation checklist
Check that the kettle's proportions and key features, like the spout and handle, are accurately captured. Look for accurate representation of light and shadow.
Frequently asked questions
How do I capture the kettle's shiny surface?
Focus on the highlights and reflections. Use an eraser to lift graphite and create bright spots, and blend to lighten areas for a more polished look.
Why does my handle look out of place?
Ensure the angles and attachment points are correct. Compare it to the kettle's body to see if the proportions and perspective feel right.
How can I draw the kettle's curved forms accurately?
Break the curves into smaller segments, and draw lightly at first. Use reference lines for the kettle's symmetry and keep adjusting until it looks right.
More drawing lessons
Get a new drawing lesson delivered to your inbox every morning, free.
Subscribe to Draw Daily →