What you'll learn
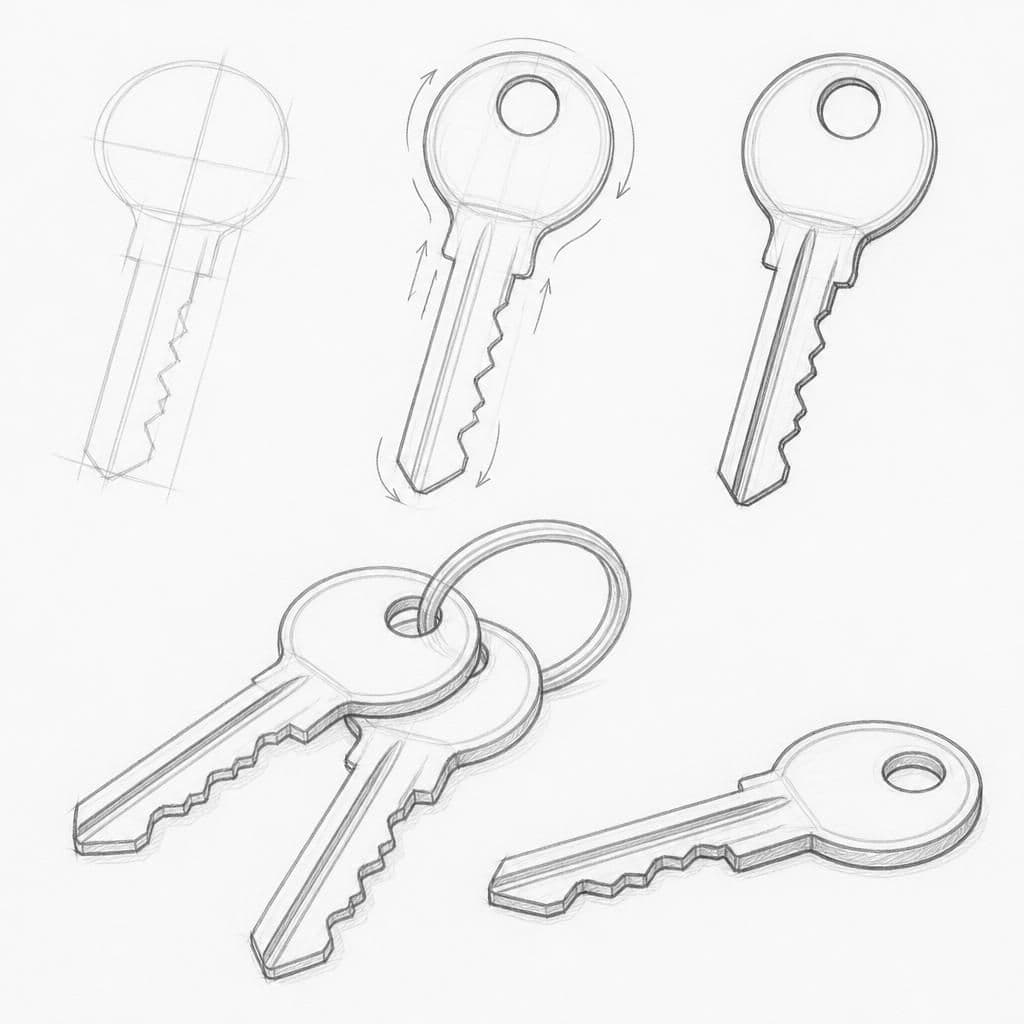
Drawing keys helps beginners focus on observing shapes and contours. The varied edges and details of keys make it ideal for practicing attention to lines and proportions without being overwhelming.
What you'll need
Step-by-step: how to draw keys
Select a key and place it on a flat surface. Ensure good lighting to enhance shadows.
Spend a minute or two observing the key's outline and details, noting any unique features.
Begin drawing the contour of the key, starting with the largest shape and working towards the smaller details.
Focus on capturing the proportions and angles of the key’s cuts and edges.
Add shading to indicate depth and any noticeable grooves or indentations.
Before you start: what to look at
Look closely at the contour and outline of the key. Notice the small teeth, the head’s shape, and where light reflects on the metal surface. Pay attention to how light creates shadows along the grooves.
Pro tips for drawing keys
Common mistakes drawing keys
Self-evaluation checklist
Check if the key's proportions and details compare well to the real object. Look for accurate representation of the key features like the head and teeth.
Frequently asked questions
How do I draw the complex details of the key teeth accurately?
Focus on the shapes and negative spaces between the teeth. Break it down into simple lines and curves to capture them accurately.
Why does my key drawing look flat?
Ensure you are adding shadows and highlights to give the key some depth. Pay attention to where the light lands and the shadows it creates.
Is it okay if my key drawing isn't exactly to scale?
For beginners, focus more on capturing the shapes and details. As you practice, work on improving the proportions gradually.
More drawing lessons
Get a new drawing lesson delivered to your inbox every morning, free.
Subscribe to Draw Daily →