What you'll learn
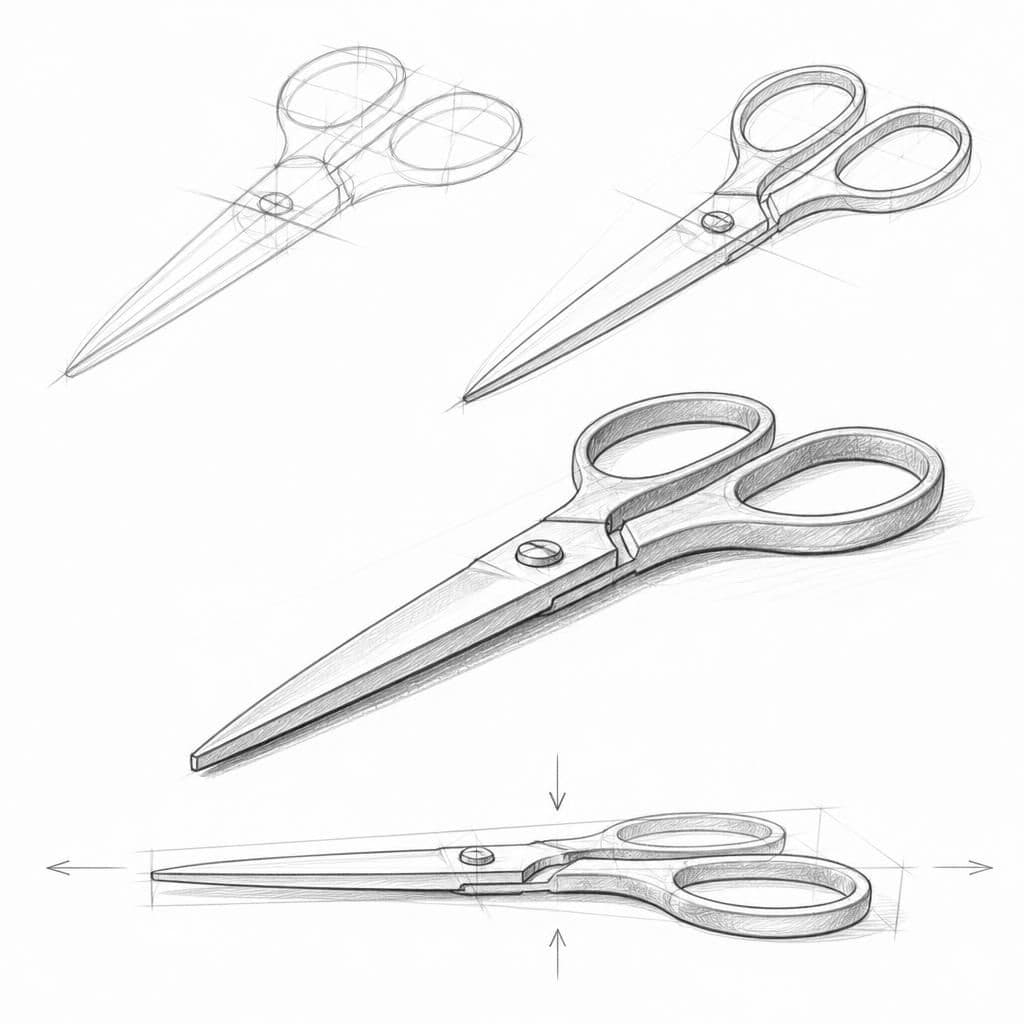
Drawing scissors demands attention to how their blades and handles recede in space due to foreshortening. This object helps practice capturing realistic depth, which is crucial for intermediate artists working on perspective.
What you'll need
Step-by-step: how to draw pair of scissors
Start by sketching a horizon line and placing a vanishing point to guide the perspective.
Outline the basic shape of the scissors, focusing on the angle and relative position of the blades and handles.
Use the vanishing point to adjust the lines of the scissors, ensuring the blades appear to recede into space.
Refine the outline by adding details like the finger holes and any noticeable screws or textures.
Finish by shading to emphasize the foreshortening effect, giving depth to the blades and handles.
Before you start: what to look at
Examine the curve where the blades meet near the pivot point. Notice how the light reflects differently on the shiny metal blades compared to the matte finish of the handles. Pay attention to the proportion between the length of the blades and the size of the finger holes, as this will influence their perceived distance in the drawing.
Pro tips for drawing pair of scissors
Common mistakes drawing pair of scissors
Self-evaluation checklist
Check if the scissors appear to have realistic depth. The handles should look closer than the blades, and the perspective lines should all align with the vanishing point.
Frequently asked questions
How do I draw the blades so they look sharp and realistic?
Focus on the subtle tapering towards the tips and the reflective quality of the metal. Use light strokes to suggest sharpness and add shading to create a metallic sheen.
What is the best way to capture the foreshortening of the handles?
Start by sketching ellipses for the finger holes, using the vanishing point to guide their orientation. Ensure the closer handle appears larger in proportion to emphasize depth.
How can I accurately depict the pivot joint of the scissors?
Observe the shape and position of the screw or rivet holding the blades together. Use shading to define its roundness and ensure it aligns correctly with the projected perspective lines.
More drawing lessons
Get a new drawing lesson delivered to your inbox every morning, free.
Subscribe to Draw Daily →