What you'll learn
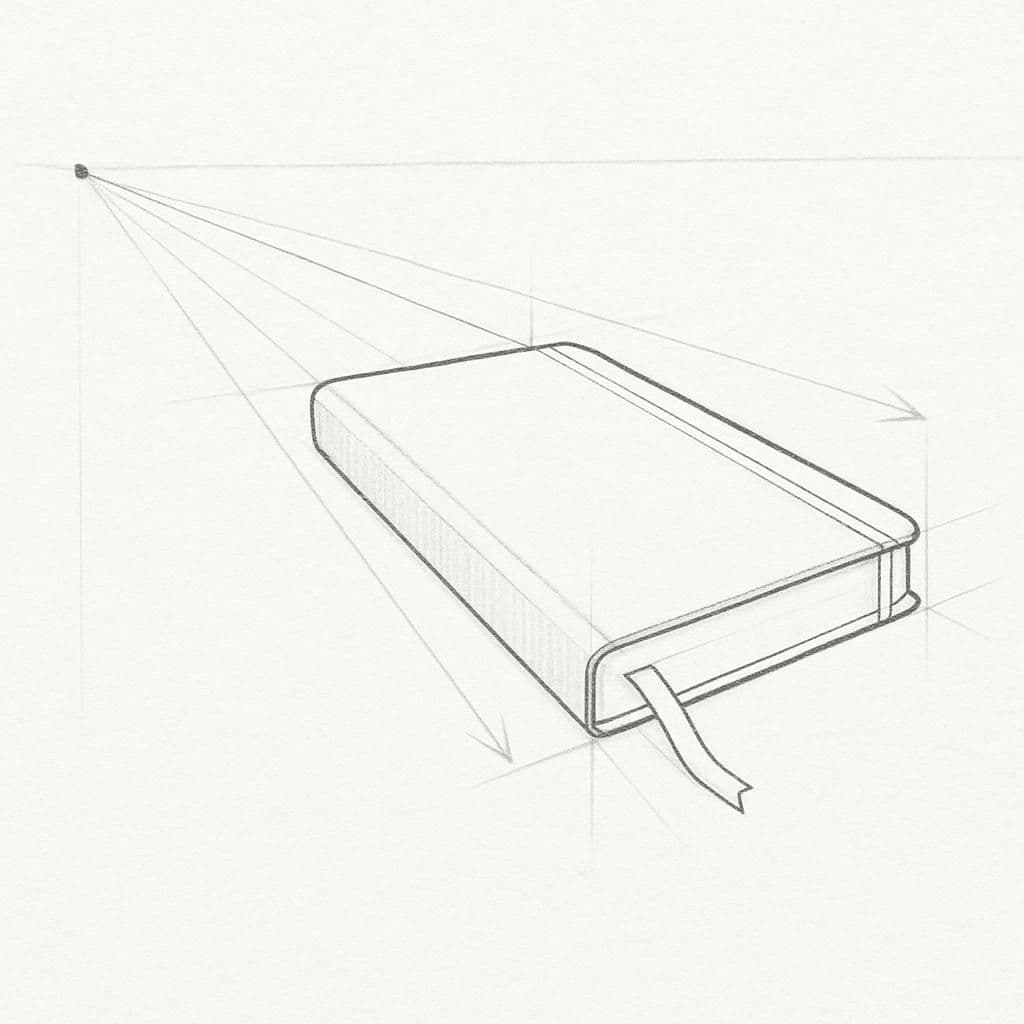
Drawing a notebook allows beginners to practice perspective by focusing on parallel lines and a central vanishing point. Observing the notebook from a corner angle demonstrates how lines converge on the horizon, reinforcing the concept of eye-level placement.
What you'll need
Step-by-step: how to draw notebook
Place the notebook on a flat surface in front of you, slightly tilted to one side.
Identify your horizon line and mark the vanishing point on the page.
Begin by drawing the front edge of the notebook as a horizontal line below the horizon line.
Draw lines from the top and bottom edges of the front cover to the vanishing point, creating a 3D effect.
Add details like the spiral binding or any text, ensuring their alignment follows the perspective lines.
Before you start: what to look at
Observe the front edge of the notebook and how it creates the illusion of depth with its slight tilt. Notice the spiral binding and how it tapers towards the vanishing point, affecting the alignment of the notebook's lines. Pay attention to how light reflects off the cover, creating highlights that define its shape and texture.
Pro tips for drawing notebook
Common mistakes drawing notebook
Self-evaluation checklist
Check if the lines of the notebook correctly converge towards the vanishing point, maintaining a consistent scale and proportion.
Frequently asked questions
Why do the spirals appear to get smaller as they go back?
This is due to perspective. As objects recede towards the vanishing point, they appear smaller. Drawing the spirals smaller helps create the illusion of depth.
How do I make the text on the notebook look correct?
Ensure the text follows the perspective lines as well. Draw guides that converge towards the vanishing point and align your letters along these guides to maintain the illusion of depth.
How can I accurately capture the notebook's thickness?
Observe the gap between the covers and the pages carefully. Draw parallel lines between the top and bottom edges, adjusting them to follow the same vanishing point for a realistic thickness.
More drawing lessons
Get a new drawing lesson delivered to your inbox every morning, free.
Subscribe to Draw Daily →