What you'll learn
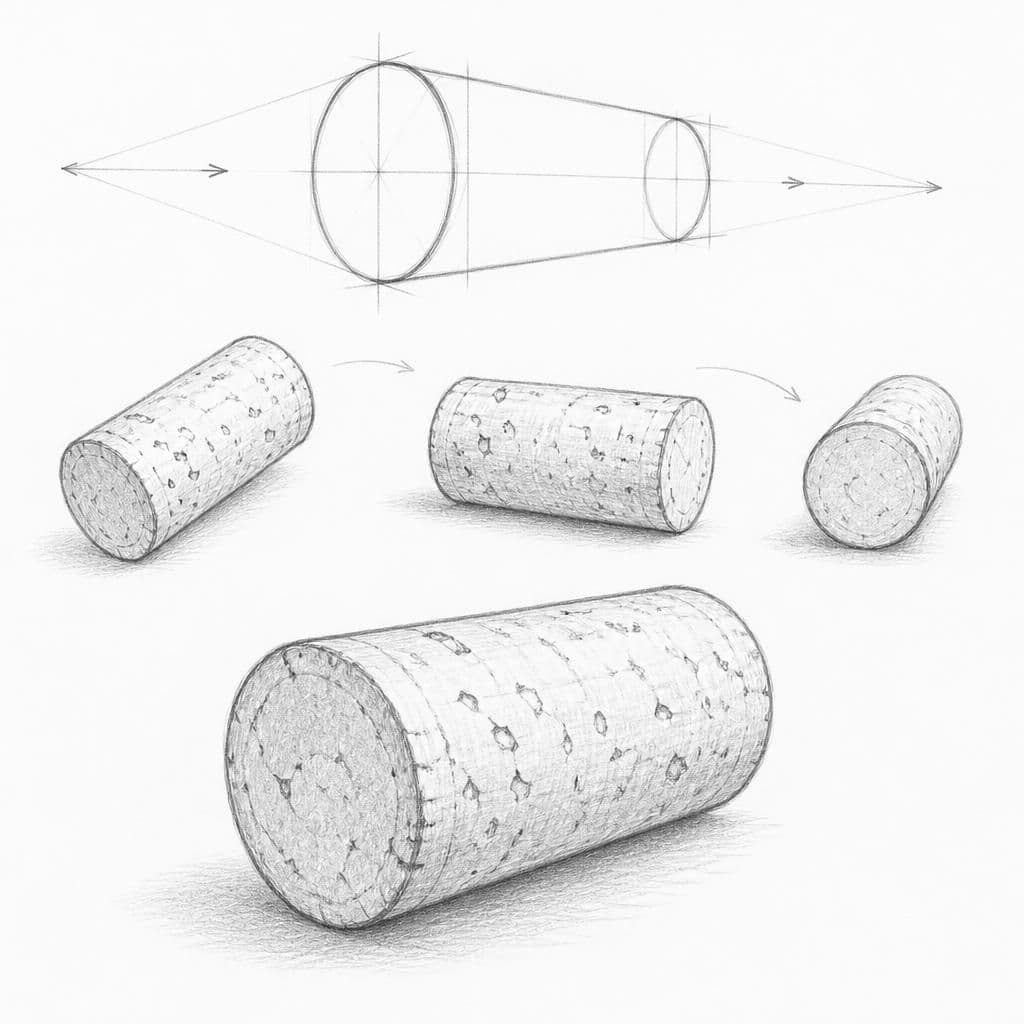
Drawing a wine cork provides a good exercise in foreshortening and understanding cylindrical forms. By focusing on the cork's round ends and its cylindrical body, you can practice rendering depth and capturing the object's proportions in perspective.
What you'll need
Step-by-step: how to draw wine cork
Start by lightly sketching the main cylindrical form of the cork, focusing on its two circular ends and their alignment.
Identify the horizon line and place the eye-level line to set up your perspective view.
Add details to the top circular end, paying attention to how its shape changes at different viewing angles.
Shade the sides of the cork to emphasize the cylindrical shape, making sure to capture the light source.
Refine the drawing by adding texture and any small details such as text or markings on the cork.
Before you start: what to look at
Before drawing, note the subtle curve of the cork's side and how light and shadow fall across its surface. Observe the texture and any text or imprints on the cork that may require attention.
Pro tips for drawing wine cork
Common mistakes drawing wine cork
Self-evaluation checklist
Check if the circular ends of the cork appear correctly foreshortened. Evaluate the overall proportion and how convincingly the cylindrical form is rendered.
Frequently asked questions
How do I accurately capture the texture of the cork?
Use a combination of light, varied strokes to mimic the uneven surface and markings of a cork. Pay attention to its unique texture by observing it closely.
What should I focus on to improve the foreshortening?
Focus on observing the visible circular ends and how their shapes change with perspective. Practice sketching them from different angles to understand their appearance.
How can I ensure the circular ends are correctly aligned?
Align the circular ends by using guidelines, and ensure their ellipses are consistent with the cylindrical form of the cork. This helps maintain the correct perspective.
More drawing lessons
Get a new drawing lesson delivered to your inbox every morning, free.
Subscribe to Draw Daily →