What you'll learn
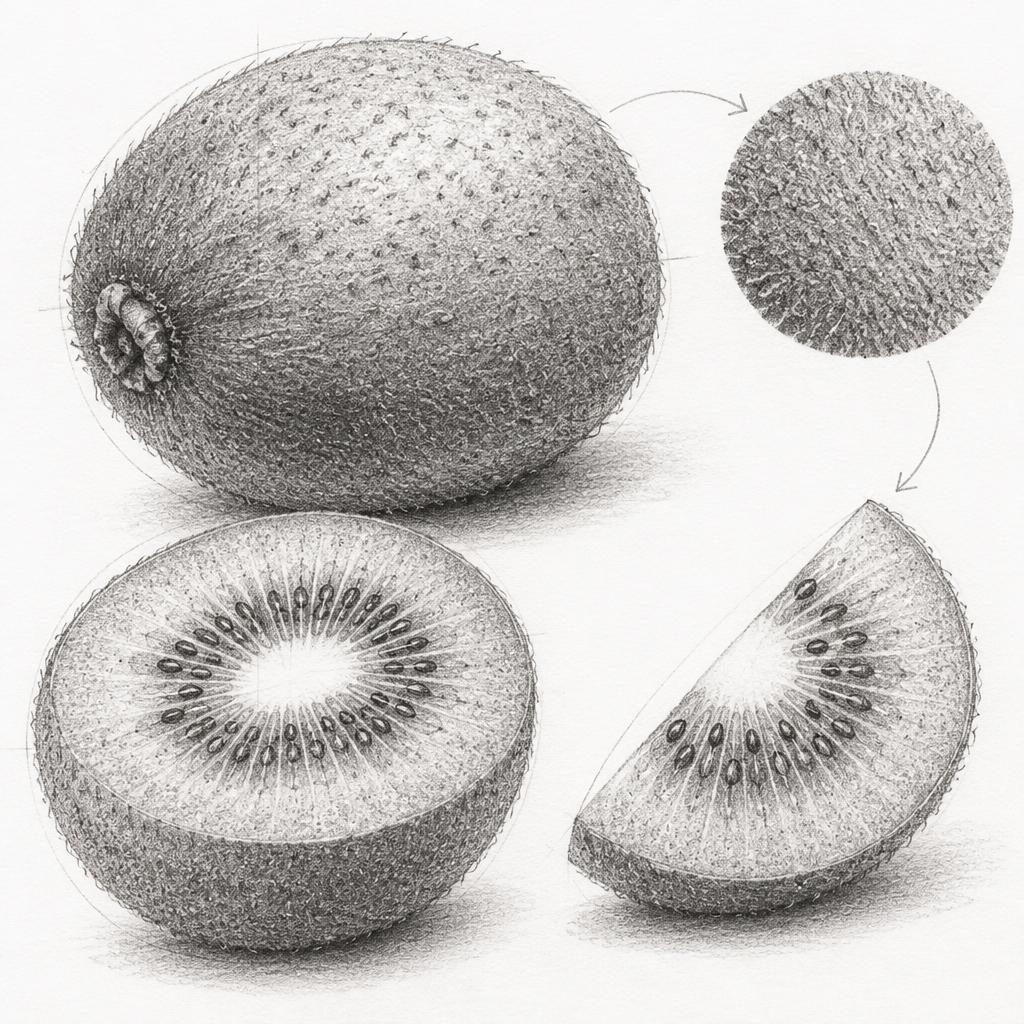
A kiwi’s fuzzy skin combines dense, short fibers with irregular speckles and subtle shifts around its curved form. Rendering it convincingly requires controlled mark variation, careful value grouping, and texture that follows the surface rather than flattening it.
What you'll need
Step-by-step: how to draw kiwi fruit
Spend 3 minutes observing the kiwi’s oval contour, stem end, and the direction in which its fine hairs catch the light.
Use 4 minutes to draw a compact outline and mark the lightest area, the core shadow, and the cast shadow.
For 5 minutes, establish the fruit’s volume with a light value layer, keeping the highlight quiet and the silhouette clear.
Spend 8 minutes adding short, tapered strokes that follow the curve, varying their length, spacing, and pressure across the lit and shaded zones.
For 6 minutes, cluster small dots and darker hair marks near the stem end and in shadow, leaving selective gaps so the skin does not become uniform.
Use the final 4 minutes to sharpen a few silhouette hairs, soften any overly busy patches, and check that the texture wraps around the fruit’s form.
Before you start: what to look at
Look closely at how the kiwi’s oval narrows near the stem end and how its fine fuzz changes direction around that curve. Notice where the light catches individual hairs along the upper edge, and compare the sparse, pale marks there with the darker, tightly clustered texture underneath.
Pro tips for drawing kiwi fruit
Common mistakes drawing kiwi fruit
Self-evaluation checklist
Squint at the drawing: the kiwi should still read as a rounded fruit before its small marks become visible. Check that the skin looks fuzzy rather than dotted, that mark density supports the light direction, and that a few hairs break the silhouette without making the contour uniformly spiky.
Frequently asked questions
How do I show the kiwi’s fuzz without losing its oval silhouette?
Keep most hair marks just inside the contour and let only a few extend beyond it. Vary their length and angle, especially near the light-facing edge, so the outline stays readable.
Should I draw the kiwi’s tiny dark speckles one by one?
Suggest them in clusters rather than placing every mark evenly. Vary their size and contrast, and let some disappear into the fuzzy surface, particularly in the highlight.
How can I keep the stem end from looking like a hole?
Treat it as a shallow, irregular scar with a darker center and softer edges. Add short hairs that overlap its rim, but preserve a few lighter breaks to show the surrounding skin.
More drawing lessons
Earlier lessons come with Pro.
Get a new drawing exercise every morning, free that day. We email you when it is up.
Subscribe to Draw Daily →