What you'll learn
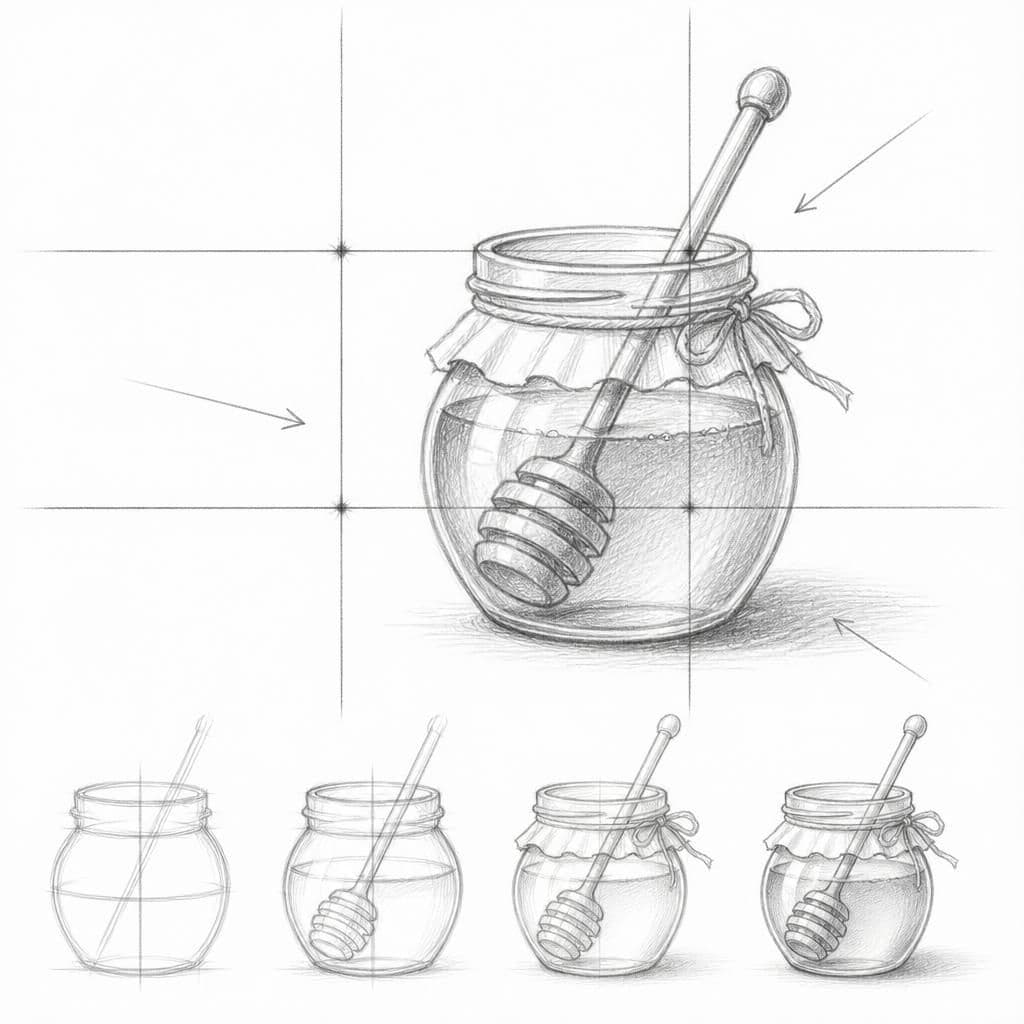
A jar of honey offers a simple yet varied shape that allows you to practice the rule of thirds. By placing the jar thoughtfully within the frame, you can create a balanced and visually appealing composition.
What you'll need
Step-by-step: how to draw jar of honey
Place your paper vertically in front of you.
Sketch a light grid dividing your paper into thirds both horizontally and vertically.
Draw the jar of honey using basic shapes to outline its main structure.
Position the jar so that its main elements align with the grid lines or intersections.
Add details to the jar, such as the label, lid, and reflections of light on the glass.
Refine your lines and add shading to provide depth and make the composition balanced.
Before you start: what to look at
Before drawing, observe the curvature from the jar's base to its lid, noting how the jar narrows and widens. Pay attention to the reflections and highlights on the glass surface, as these will guide the light rendering. Notice the proportion between the jar's height and width to keep its shape realistic.
Pro tips for drawing jar of honey
Common mistakes drawing jar of honey
Self-evaluation checklist
Check if the jar is well-positioned according to the rule of thirds. Evaluate the balance of space and how the composition guides the viewer's eye across the page.
Frequently asked questions
How do I draw the reflections on the glass jar?
Identify the light source and note the brightest spots on the jar. Use light, quick strokes to suggest reflections. Avoid heavy outlines, which can make reflections appear unnatural.
How should I handle the jar's label and text?
First, outline the label's general shape and position. Simplify text into basic shapes, focusing on its placement and size. Keep details minimal to avoid distracting from the overall composition.
What is the best way to represent the honey inside the jar?
Use subtle shading to show the honey's level within the jar. A soft gradient can suggest transparency and density, with darker tones at the bottom to imply depth.
More drawing lessons

Get a new drawing lesson delivered to your inbox every morning, free.
Subscribe to Draw Daily →