What you'll learn
A ceramic plate's simple circular shape offers a great opportunity to practice composition using the rule of thirds. By creatively positioning and framing the plate, you can learn to guide the viewer’s eye and create a balanced drawing.
What you'll need
Step-by-step: how to draw ceramic plate
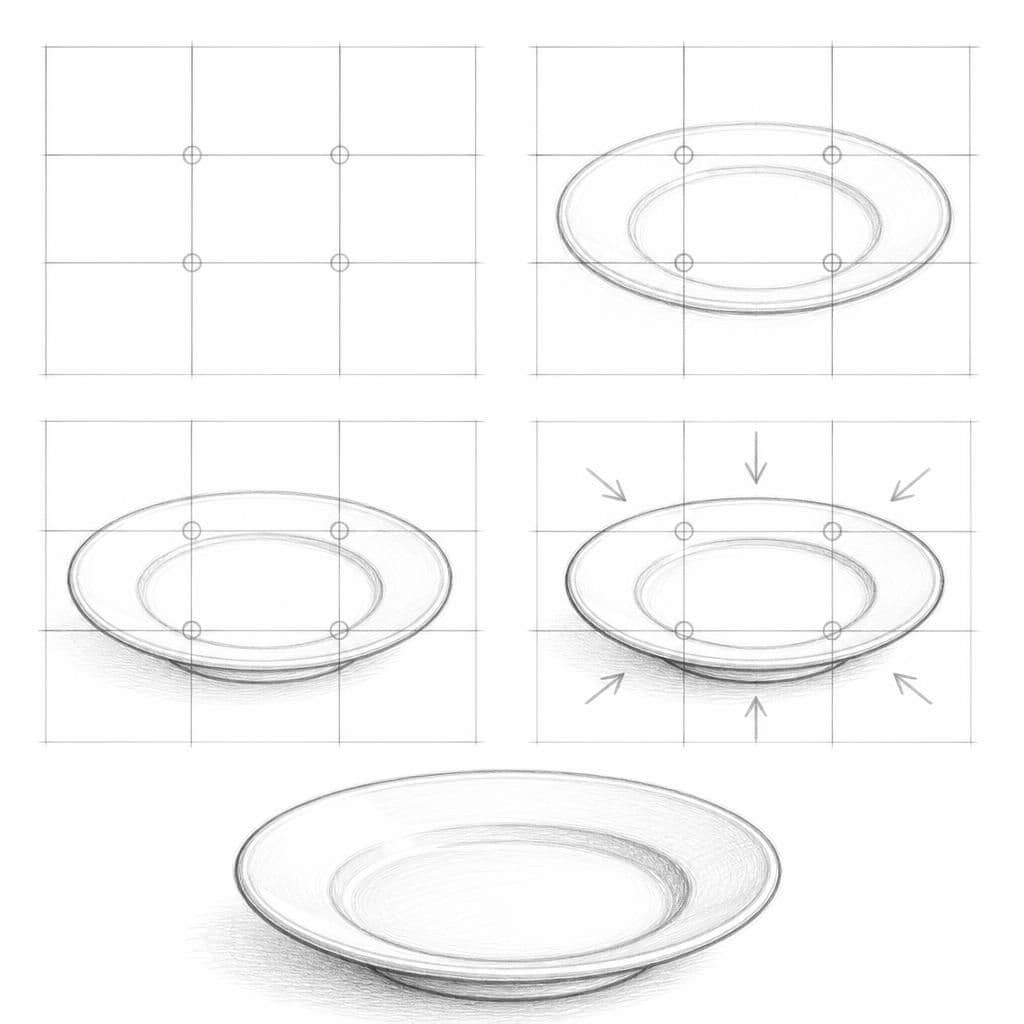
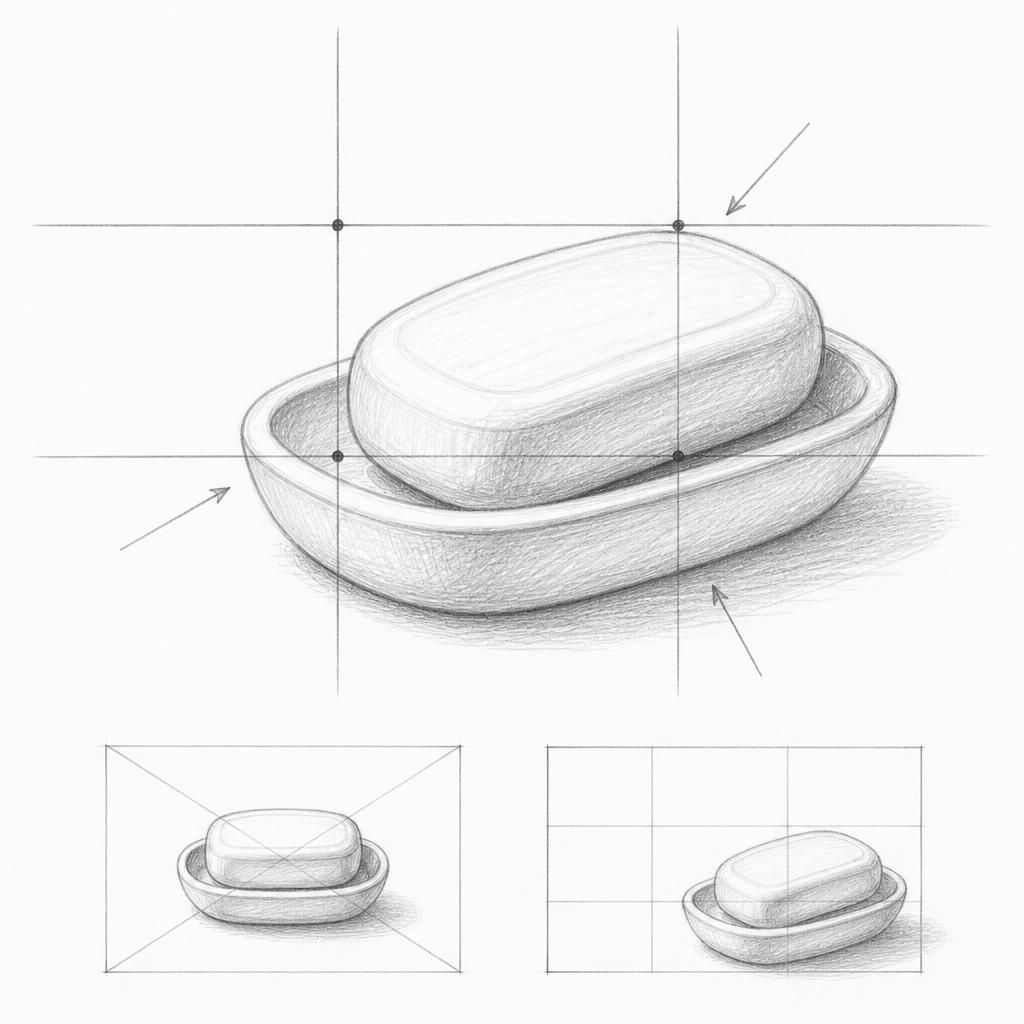
Start by sketching a grid on your paper that divides it into thirds both horizontally and vertically.
Draw the ceramic plate in one of the intersecting points of the grid to explore the rule of thirds.
Experiment with the orientation and size of the plate to see how it alters the composition.
Add minor details like shadows or surface texture to give the plate more context in the composition.
Evaluate the balance and adjust the placement if necessary to enhance the visual interest.
Before you start: what to look at
Before drawing, observe the rim: note its thickness and how it curves sharply or gently. Pay attention to how light reflects on the glossy surface, creating highlights. Look at the shadows underneath, which can vary depending on the lighting angle.
Pro tips for drawing ceramic plate
Common mistakes drawing ceramic plate
Self-evaluation checklist
Check if the viewer's eye naturally follows across the drawing. Ensure the composition feels balanced and the subject is effectively placed according to the rule of thirds.
Frequently asked questions
How do I accurately draw the circular shape of the plate?
Start by visualizing the circle as an ellipse due to perspective. Lightly sketch the ellipse and refine it until the proportions appear consistent with the observed plate. Use your grid lines to help maintain symmetry.
What should I consider about the material when drawing a ceramic plate?
Consider the plate's glossy surface and how it interacts with light. Focus on capturing both highlights and reflections to convey the material's smooth texture. This will help differentiate it from other materials.
How can I avoid making the plate look flat and uninteresting?
Emphasize the contrast between light and shadow: add subtle changes in shading to suggest curvature. Incorporate details like the shadow's gradient and slight variations in the plate's edge to enhance depth.
More drawing lessons

Get a new drawing lesson delivered to your inbox every morning, free.
Subscribe to Draw Daily →