What you'll learn
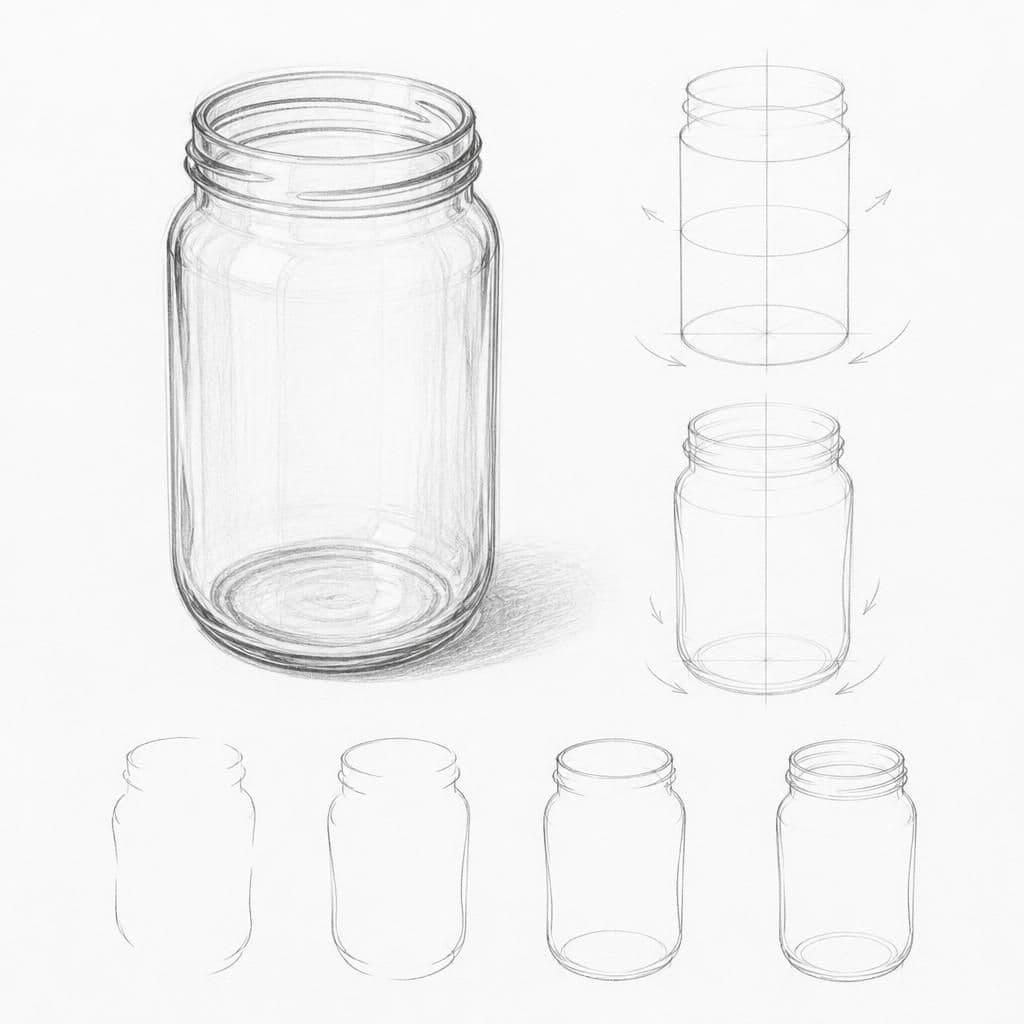
Drawing a glass jar challenges you to capture transparency and subtle reflections. It demands attention to both the outer contours and the inner details, such as the lid and any decorative elements.
What you'll need
Step-by-step: how to draw glass jar
Place the glass jar in good lighting, ensuring some reflections are visible.
Spend a full minute just observing the jar, noting the reflections, shadows, and distortions.
Begin sketching the contour lines of the jar, focusing on the accuracy of the shape.
Add details, like the lid and any labels or textures, always referencing the observed reflections and highlights.
Before you start: what to look at
Pay close attention to the rim of the jar, observing how it refracts light and distorts the view through it. Notice the curves of the sides and how they taper towards the base. Observe how reflections and highlights create a contrast with the surrounding shadows, especially on the inner surface of the jar.
Pro tips for drawing glass jar
Common mistakes drawing glass jar
Self-evaluation checklist
Evaluate the sketch based on how well the contours and reflections are captured. Check for proportional accuracy and whether the jar's transparency is convincingly depicted.
Frequently asked questions
How do I capture the transparency of the glass?
Focus on the reflections and highlights that define the glass's surface. Contrast these with the soft shadows inside the jar to suggest transparency. Use light, gentle pencil strokes to avoid a heavy, opaque look.
What should I do if the jar looks skewed or asymmetrical?
Double-check the alignment of key points, like the top and bottom edges. Use vertical and horizontal guide lines lightly penciled in to maintain symmetry. Consistently compare each side of the jar to ensure balance.
How do I draw the reflections on the curved surface?
Observe how the light source reflects off the curves, creating bands or patches of light. Sketch these reflections with varied pressure to capture their subtlety. Use erasers to refine and highlight specific areas if needed.
More drawing lessons
Get a new drawing lesson delivered to your inbox every morning, free.
Subscribe to Draw Daily →