What you'll learn
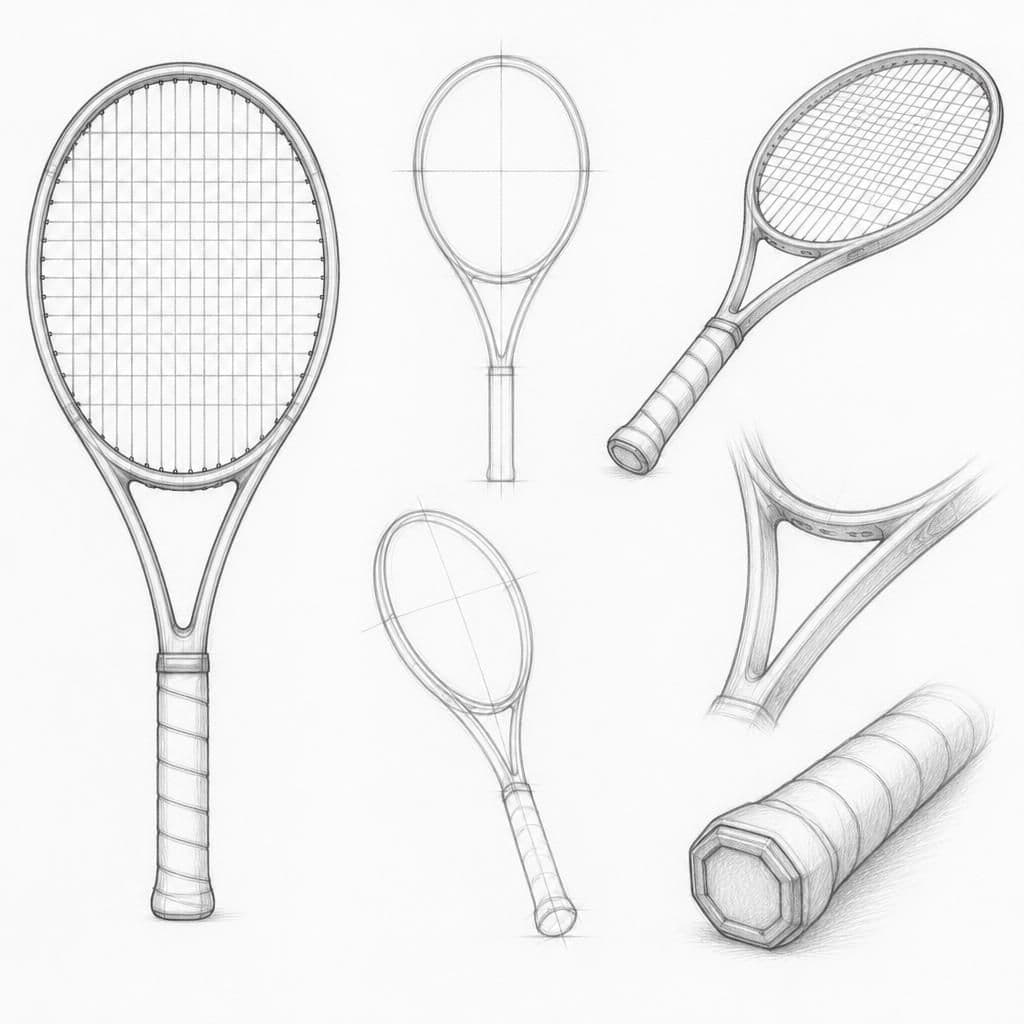
The tennis racket offers distinct parts such as the handle, strings, and frame, allowing for practice in measuring proportions and capturing the object's overall volume. It is simple enough for beginners yet detailed enough to challenge their perception of shapes and space.
What you'll need
Step-by-step: how to draw tennis racket
Begin by sketching the overall outline of the racket, focusing on the basic shape with the handle and head.
Lightly draw a centerline down the neck of the racket to ensure symmetry.
Refine the handle proportions, paying attention to the length relative to the frame.
Draw the strings within the head, maintaining equal spacing and curvature to suggest tension and volume.
Add details to the grip and refine the frame to enhance the three-dimensional appearance.
Pro tips for drawing tennis racket
Self-evaluation checklist
Ensure the racket's handle and frame are proportionally accurate. The strings should convey tension and depth, giving a sense of the racket’s volume. Verify symmetry through the centerline and overall balance of the sketch.
Frequently asked questions
How long does this drawing exercise take?
The full tennis racket exercise is designed to fit in about 15 minutes of focused practice, which is one of the reasons it works as a daily habit.
Do I need any prior drawing experience?
No. This lesson is aimed at beginner artists and assumes only a pencil, paper, and willingness to observe.
What skill does this lesson target?
The focus is proportion & volume. Repeating similar exercises over time is how this skill becomes second nature.
More drawing lessons
Get a new drawing lesson delivered to your inbox every morning, free.
Subscribe to Draw Daily →