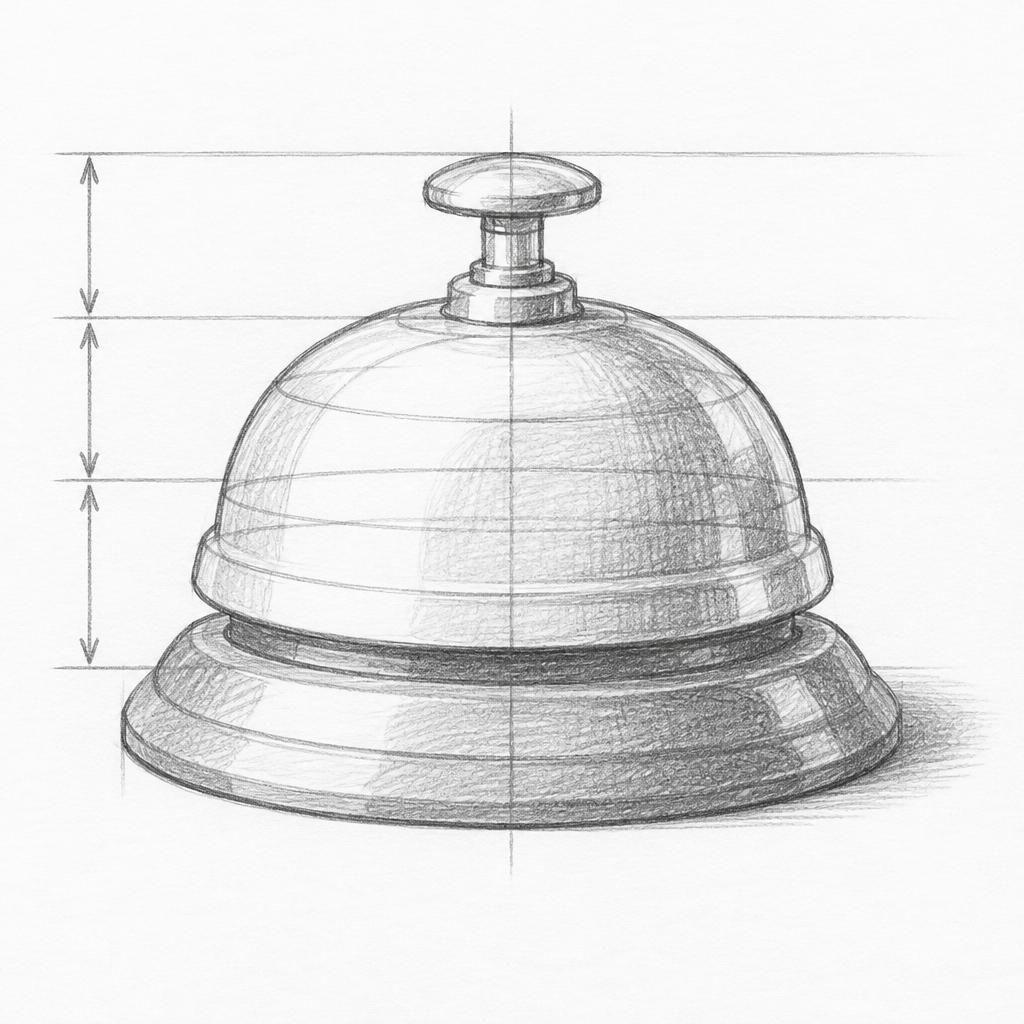
What you'll learn
A desk bell combines a low domed top, a narrow stem, and a flared base, so you can compare several widths and heights within one compact form. Cross-contours across the dome and base help show their round volume instead of leaving them as flat outlines.
What you'll need
Step-by-step: how to draw desk bell
Spend 2 minutes observing the bell. Compare its total height with the base width, and note where the dome, stem, and base meet.
Use 3 minutes to block in the overall height and width with light marks. Place the widest point of the base and the top of the dome before adding details.
Spend 4 minutes drawing the dome, stem, and flared base as simple volumes. Check each part's width against the total height and keep the bell's centerline consistent.
Use 3 minutes to add a few curved cross-contour guides across the dome and base, following their rounded surfaces. Indicate the rim and button only after the main proportions read correctly.
Spend the final 3 minutes adding a light-to-dark value pattern. Keep the brightest area on the lit side, and use a narrow shadow beneath the rim and base to reinforce their thickness.
Before you start: what to look at
Look at how far the base extends beyond the stem, and where the dome begins to narrow toward its top button. Notice the ellipse of the base rim and the curved highlight across the dome, which reveal the bell's tilt and rounded volume.
Pro tips for drawing desk bell
Common mistakes drawing desk bell
Self-evaluation checklist
Check whether the dome, stem, and base have the right widths relative to the bell's total height. The base should feel flared and elliptical, while the dome should read as rounded through its contour and light-to-dark shading, not as a flat semicircle.
Frequently asked questions
How do I draw the base rim as an ellipse?
Use a shallow ellipse if you are viewing the bell near eye level, and make it taller as your viewpoint moves above it. Keep the front curve slightly broader than the back curve, but make both sides symmetrical around the centerline.
How can I make the dome look metal without drawing every reflection?
Choose one broad highlight shape and keep its edge clean against a darker value beside it. A narrow bright accent near the curved edge can suggest polished metal without distracting from the dome's volume.
Where should the stem meet the dome and base?
Align both junctions to the bell's centerline, then check that the stem width stays consistent between them. The stem should disappear naturally into the dome and base rather than sit on top as a separate stripe.
More drawing lessons
Earlier lessons come with Pro.
Get a new drawing exercise every morning, free that day. We email you when it is up.
Subscribe to Draw Daily →