What you'll learn
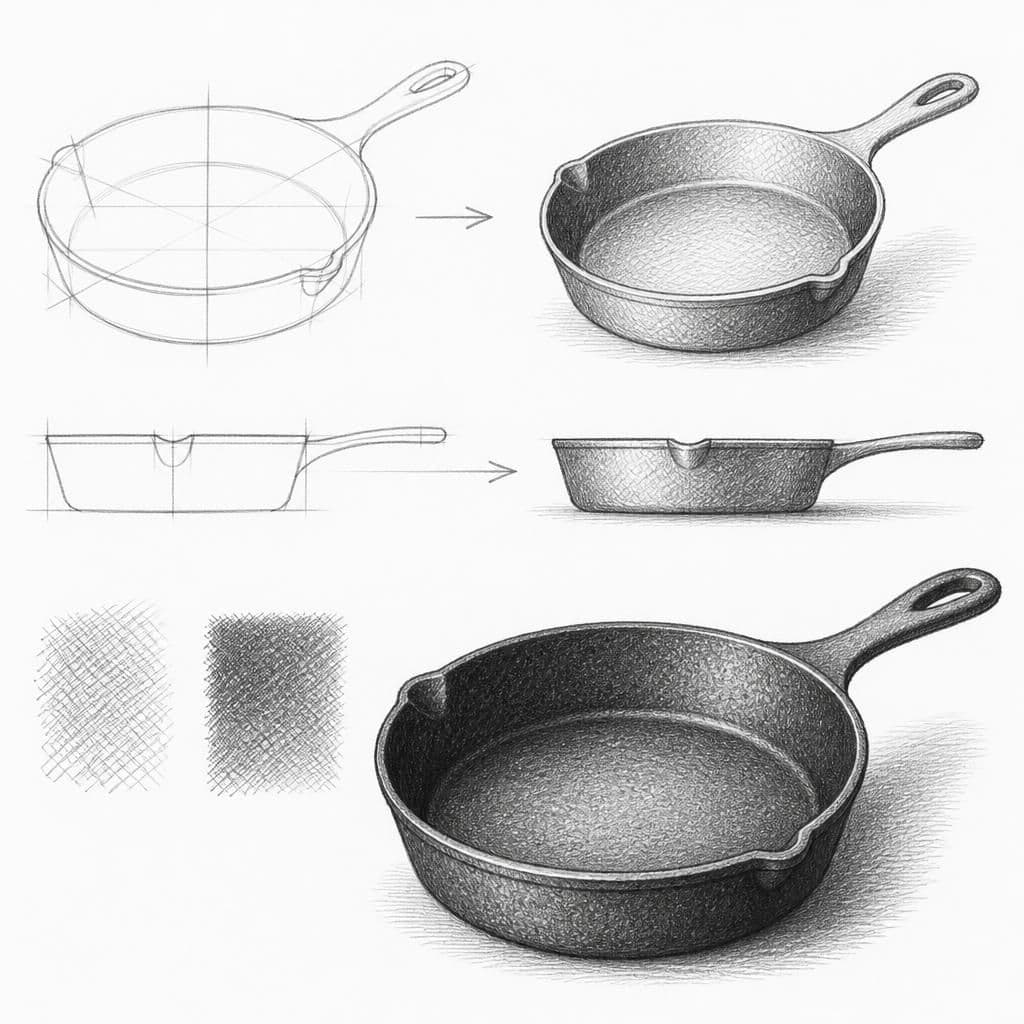
Drawing a cast iron skillet offers a chance to work with rough, grainy textures. The surface has subtle variations in tone and texture that are ideal for practicing cross-hatching at an intermediate level.
What you'll need
Step-by-step: how to draw cast iron skillet
Choose an angle to view your skillet that highlights its surface texture.
Lightly sketch the basic shape and proportions using pencil.
Identify areas with the most visible texture and shade them using cross-hatching.
Focus on creating varied textures on the skillet’s surface, adjusting the density of your hatching.
Add shading to the handle and any visible imperfections to enhance realism.
Review your drawing, refining textures and contrast for clarity and impact.
Pro tips for drawing cast iron skillet
Self-evaluation checklist
Check if the texture feels consistent and natural. Evaluate the contrast between rough and smooth areas to ensure they are distinguishable.
Frequently asked questions
How long does this drawing exercise take?
The full cast iron skillet exercise is designed to fit in about 30 minutes of focused practice, which is one of the reasons it works as a daily habit.
Do I need any prior drawing experience?
No. This lesson is aimed at intermediate artists and assumes only a pencil, paper, and willingness to observe.
What skill does this lesson target?
The focus is texture. Repeating similar exercises over time is how this skill becomes second nature.
More drawing lessons
Get a new drawing lesson delivered to your inbox every morning, free.
Subscribe to Draw Daily →