What you'll learn
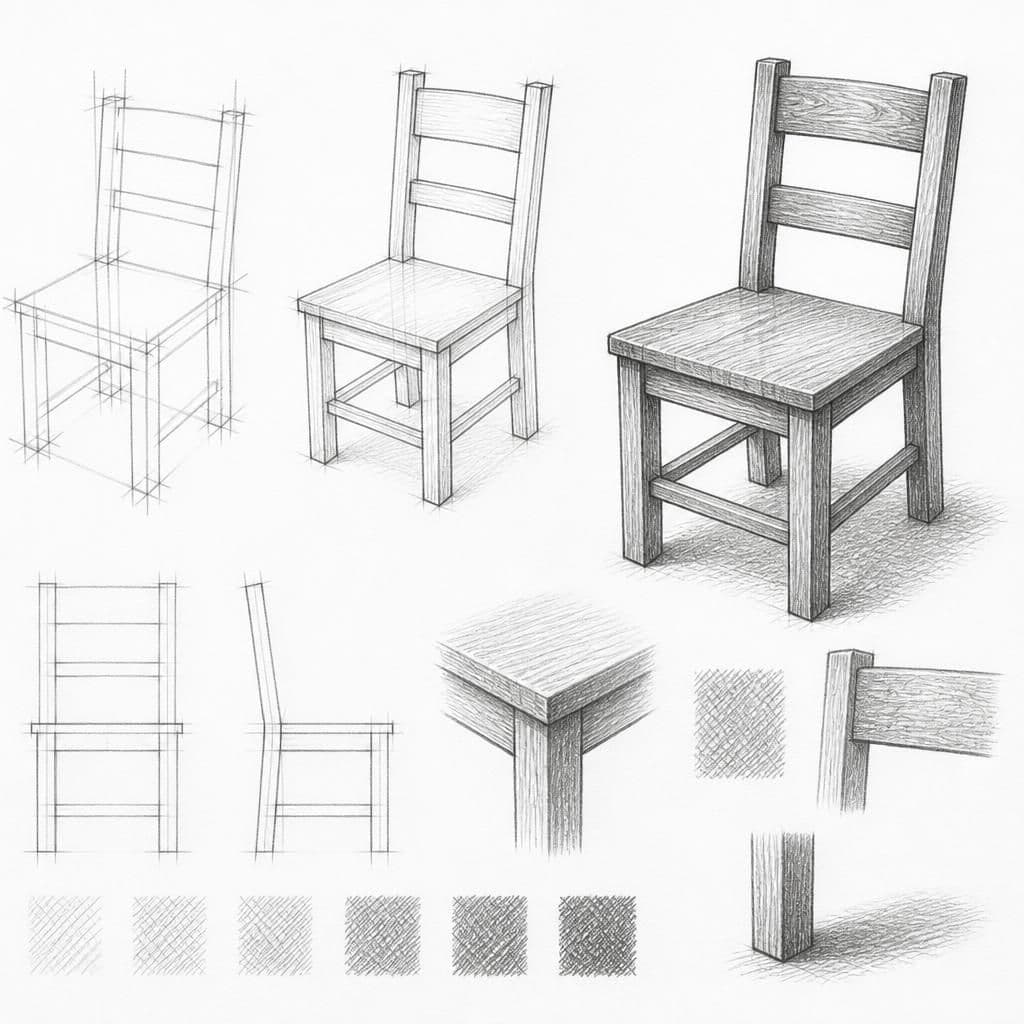
A wooden chair offers a fantastic opportunity to practice rendering different wood textures like grain, smooth surfaces, and worn edges. This exercise helps intermediate artists capture nuances in surface texture through controlled line work.
What you'll need
Step-by-step: how to draw wooden chair
Start with a quick, light sketch of the chair, focusing on its basic shapes and proportions.
Identify areas where the wood grain is most visible and begin to define these with light lines.
Use cross-hatching to add depth and texture to the wood grain. Vary the pressure and angle to differentiate between smooth and rough areas.
Step back and add any additional details like small imperfections or surface wear using more defined lines or additional cross-hatching.
Before you start: what to look at
Before drawing, observe the curves of the chair legs and the way they join the seat. Notice how light hits the backrest, creating highlights on the curves and shadows beneath. Pay attention to the direction and pattern of the wood grain on flat surfaces and worn edges.
Pro tips for drawing wooden chair
Common mistakes drawing wooden chair
Self-evaluation checklist
Examine whether the wood grain looks natural and if the texture effectively conveys the material quality. Check for a balance of light and shadow that enhances the three-dimensionality of the chair.
Frequently asked questions
How do I accurately depict the perspective of the chair?
Start by identifying the vanishing points and the horizon line in your composition. Take note of how the chair's legs recede into space. Use these guides to maintain consistency in angles and proportions.
What's the best way to show different wood textures?
Use a combination of line weight and cross-hatching. Light lines work well for smooth textures, while varied pressure and angles in cross-hatching can simulate rougher surfaces. Highlight imperfections with sharper, more deliberate strokes.
How can I avoid making the chair look flat?
Focus on creating a good balance of light and shadow. Pay close attention to where shadows fall under the seat, around the joints, and below the seat's edges. This adds depth and dimension to your drawing.
More drawing lessons
Get a new drawing lesson delivered to your inbox every morning, free.
Subscribe to Draw Daily →