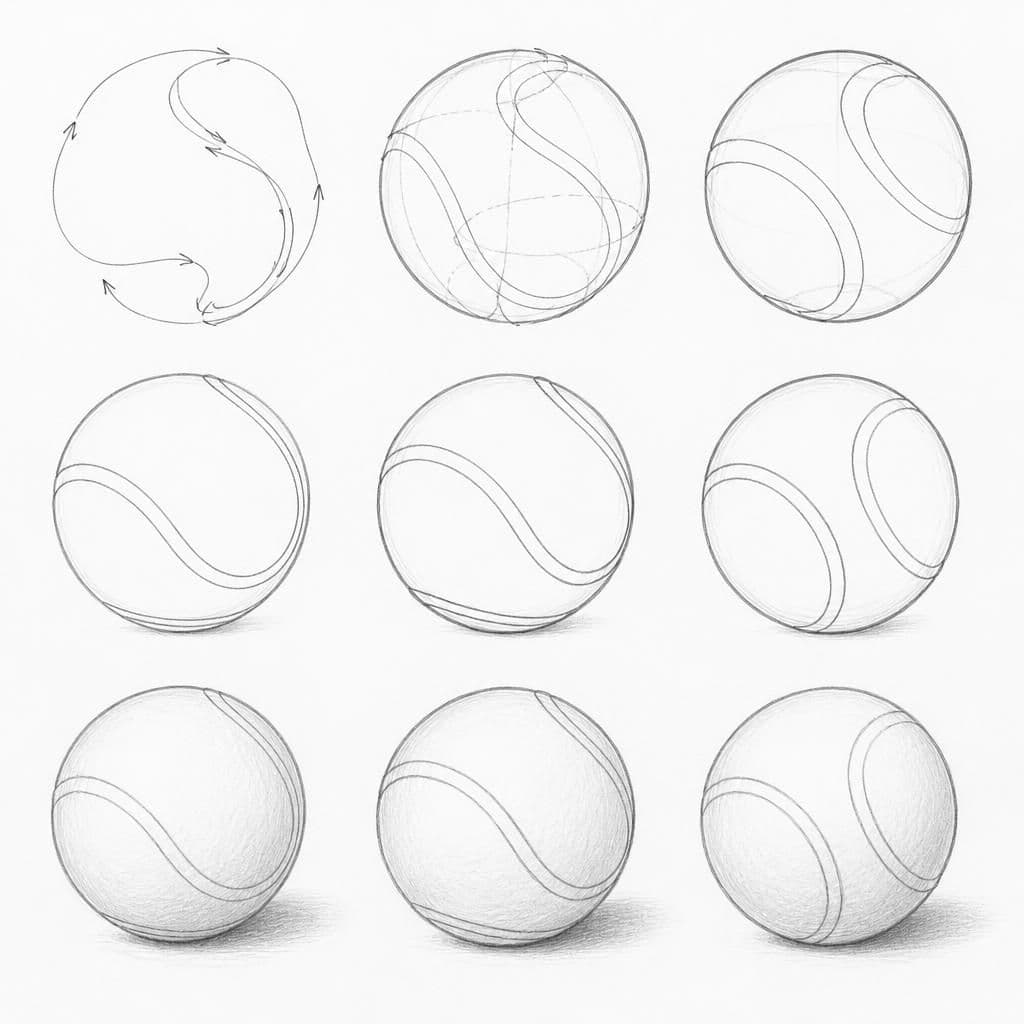
What you'll learn
A rubber ball is simple yet effective for practicing observational drawing. Its smooth, curved surface will help you focus on capturing true proportions and shape.
What you'll need
Step-by-step: how to draw rubber ball
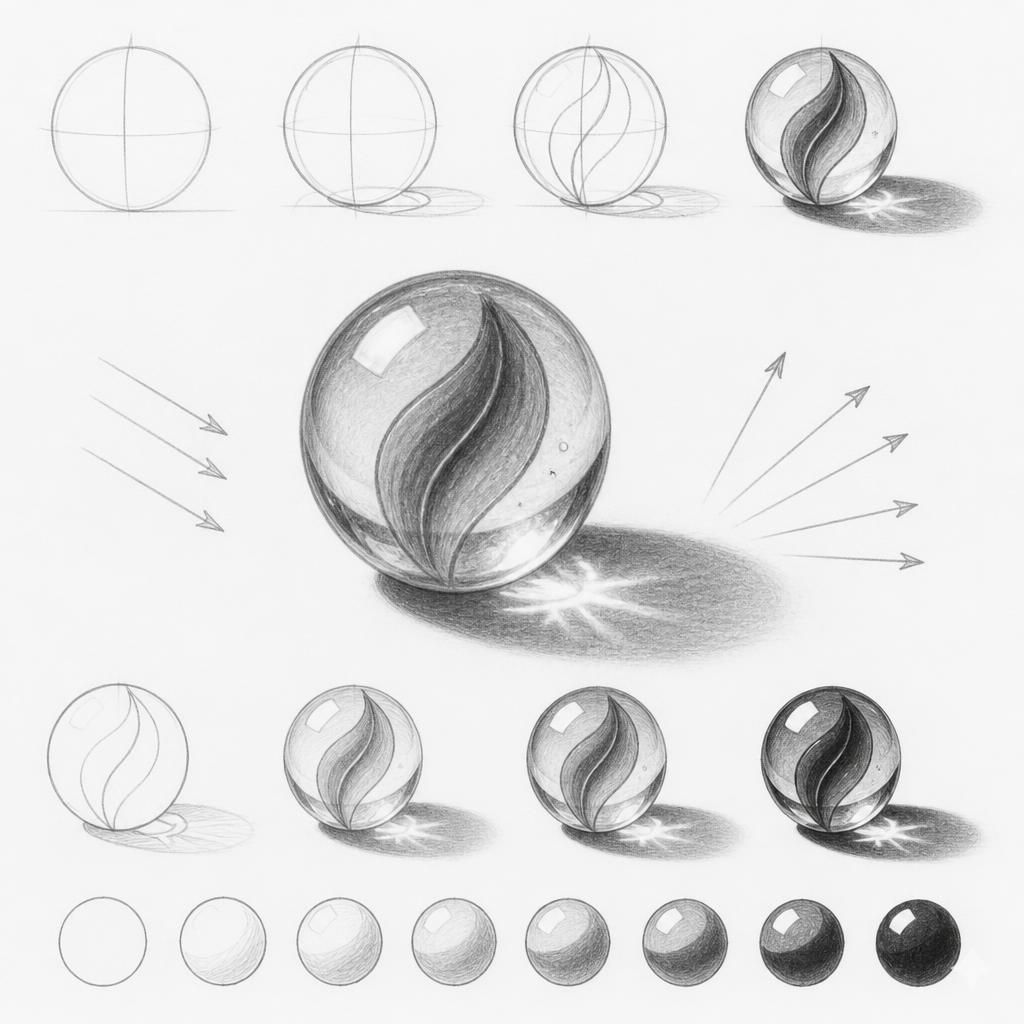
Place the rubber ball in a well-lit area to observe how light and shadow define its shape.
Spend a few minutes observing the ball's contours and how light interacts with its surface.
Lightly sketch the outline of the ball with a continuous line, focusing on its shape and proportions.
Add details of any patterns or textures if present, while keeping your lines soft and fluid.
Refine your drawing by adjusting the outline and shading to enhance the three-dimensional feel.
Before you start: what to look at
Take a close look at where the light lands on the ball, creating a bright spot. Notice the subtle gradient of shadow that wraps around to the opposite side. Pay attention to the ball's curvature and how it affects the light transition from highlight to shadow.
Pro tips for drawing rubber ball
Common mistakes drawing rubber ball
Self-evaluation checklist
Check if your drawing captures the ball's correct shape and proportions. Evaluate the realism of light and shadow effects across the surface.
Frequently asked questions
Why does my ball look flat even though I followed the steps?
This could be due to not capturing the light and shadow accurately. Make sure your shading reflects the gradual transition from light to dark around the ball's surface to enhance its roundness.
How should I handle drawing a ball with patterns or textures?
Start by lightly sketching the overall shape and proportions. Then, observe where the patterns fall in relation to light and shadow, integrating them subtly into your shading to maintain a three-dimensional appearance.
What perspective issues should I be aware of when drawing a ball?
Be mindful that depending on your viewing angle, the ball will not appear as a perfect circle. Observe any slight elliptical distortion and adjust your outline to reflect the ball's true perspective.
More drawing lessons
Get a new drawing lesson delivered to your inbox every morning, free.
Subscribe to Draw Daily →