What you'll learn
Drawing a plush toy helps beginners focus on contour lines and shapes. Observing the varied textures and stitching teaches how to translate soft, subtle shapes into pencil strokes.
What you'll need
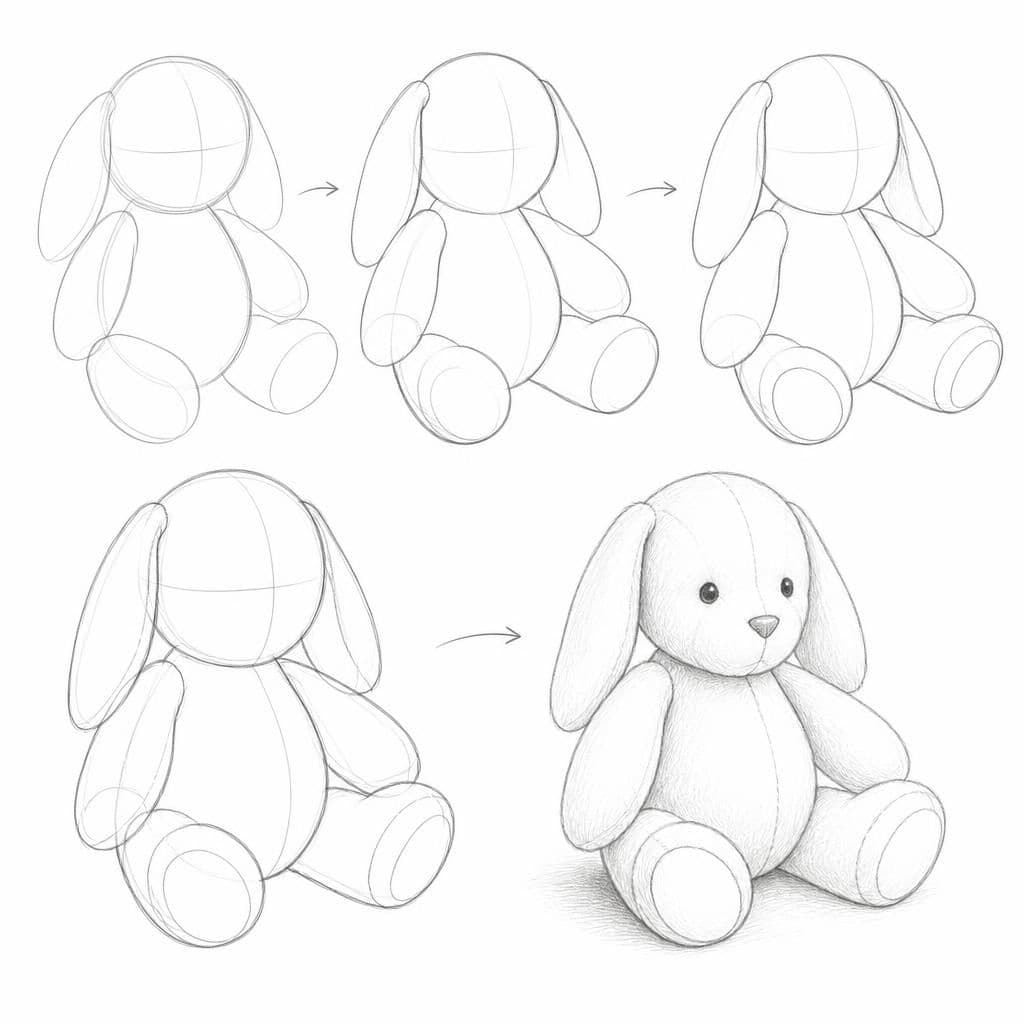
Step-by-step: how to draw plush toy
Place the plush toy in front of you, at a comfortable viewing angle.
Spend 2 minutes observing the outline and key shapes, noting unique features.
Start sketching lightly, focusing on the contour of the toy with long, smooth strokes.
Add details such as stitching and texture, paying attention to shadows and light areas.
Before you start: what to look at
Notice the contours of the plush toy: the roundness of its body, the seams, and where the light highlights its surface. Pay close attention to the shadows under its arms and legs, and the way the fabric creases.
Pro tips for drawing plush toy
Common mistakes drawing plush toy
Self-evaluation checklist
Check if the sketch captures the soft shapes and the unique features of the plush toy. Evaluate if the proportions and details resemble the observed object.
Frequently asked questions
How do I make the plush toy look fluffy?
Use soft strokes to imply texture and keep lines light to suggest softness. You can also blend lightly with your finger or a blending stump.
What if the proportions seem off after I've started?
Lightly sketch the entire form first, then double-check shapes and sizes before darkening lines. Use erasers to adjust proportions.
How do I capture the different fabric textures?
Observe the fabric closely, noting how light interacts with it. Use varied line weights and directions to suggest different textures.
More drawing lessons
Get a new drawing lesson delivered to your inbox every morning, free.
Subscribe to Draw Daily →