What you'll learn
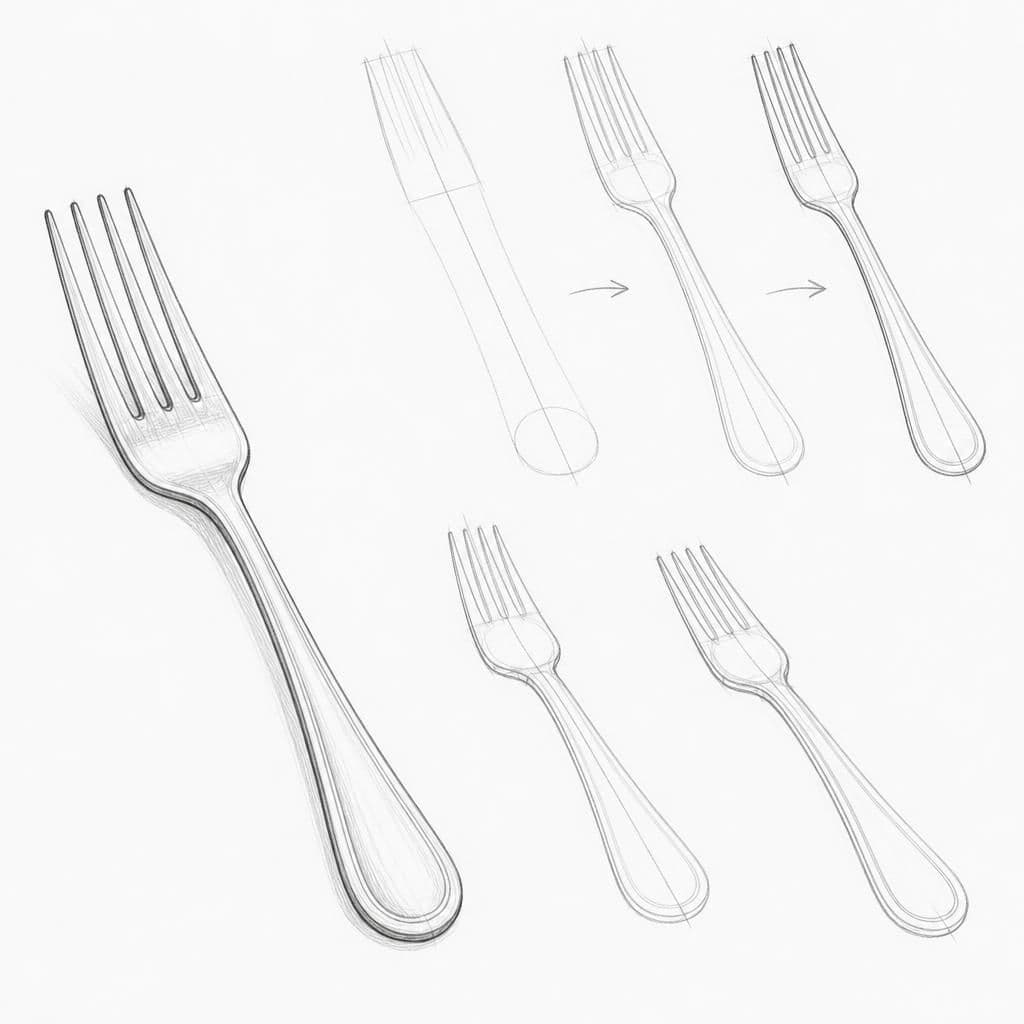
Drawing a metal fork helps beginners focus on observing simple yet varied shapes, like tines and handles. Its reflections and metallic surface offer a chance to learn about light and shadow.
What you'll need
Step-by-step: how to draw metal fork
Place the fork on a flat surface with good lighting.
Start by drawing the outline of the fork's handle, observing its length and proportions.
Move to the tines, paying attention to the spacing and alignment.
Add details like any reflections or shadows on the fork's surface.
Before you start: what to look at
Look at the way light interacts with the metal: notice the reflections and where shadows lie. Observe the curve of the handle and how it transitions to the tines.
Pro tips for drawing metal fork
Common mistakes drawing metal fork
Self-evaluation checklist
Compare your drawing to the actual fork. Check if the proportions, angles, and spacing of the tines match your observation.
Frequently asked questions
How do I draw the reflections on the fork?
Start by lightly marking areas of bright reflections and shadow. Use gentle hatching to suggest the reflective surface.
How can I make the fork look three-dimensional?
Focus on light and shadow. Emphasize where light hits and where shadows form to create depth.
What if my fork's proportions look off?
Re-evaluate the overall length and width. Redraw sections lightly until they reflect your observations accurately.
More drawing lessons
Get a new drawing lesson delivered to your inbox every morning, free.
Subscribe to Draw Daily →