What you'll learn
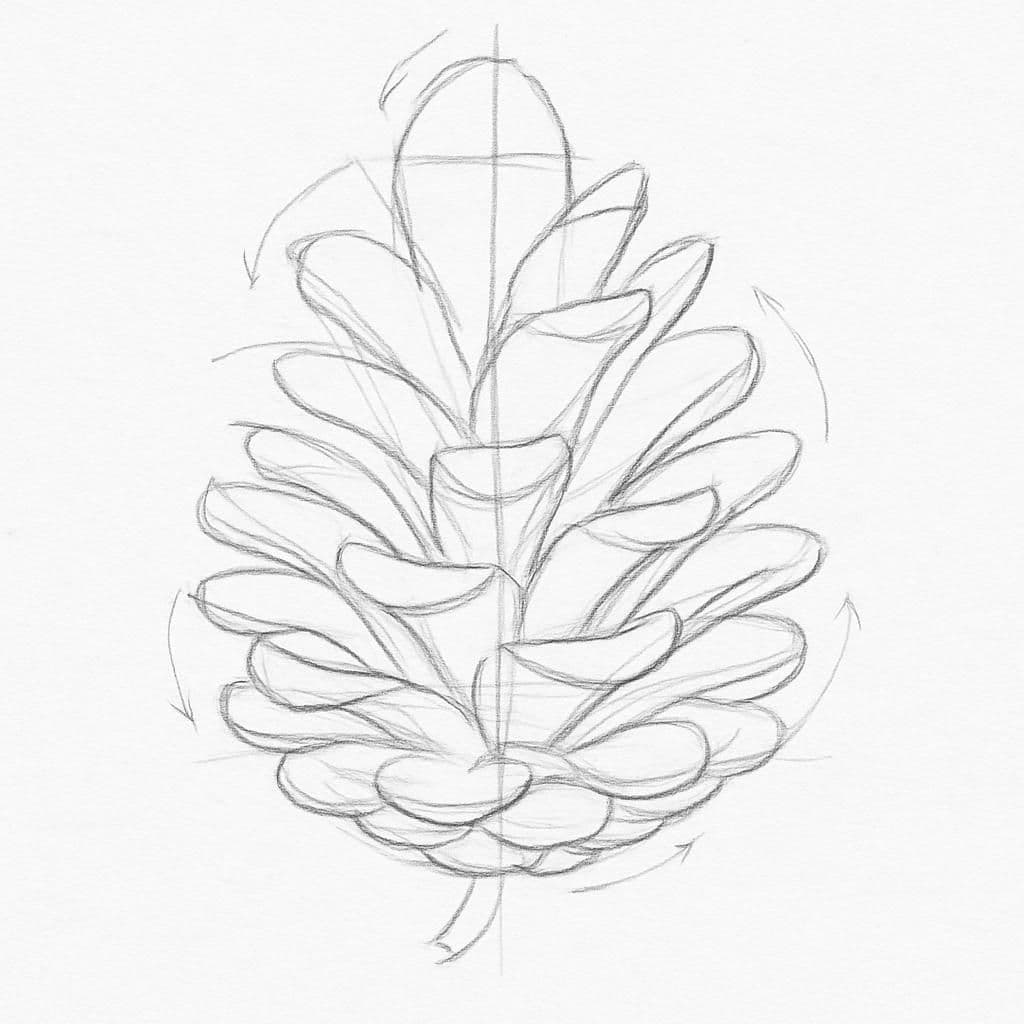
Drawing a pinecone helps beginners understand volume due to its layered, spiraling form. This exercise challenges the artist to measure the relative size of each scale while capturing the object's three-dimensional shape.
What you'll need
Step-by-step: how to draw pinecone
Start by lightly drawing the overall shape of the pinecone, focusing on its proportions compared to its actual size.
Identify the central axis of the pinecone, which helps in aligning the layered scales symmetrically.
Sketch the individual scales using contour lines, beginning from the bottom and working your way up, ensuring the size of scales decreases as they reach the top.
Add depth to the drawing by carefully observing light and shadow on each scale, using contour lines to suggest volume.
Refine details and adjust the placement of scales to ensure each fits naturally within the context of the pinecone's form.
Before you start: what to look at
Before starting, observe the point where the pinecone's base meets the surface. Notice how light falls on the topmost scales, creating a gradient towards the bottom. Pay attention to the spiral pattern and how each scale overlaps its neighbors, forming a natural rhythm.
Pro tips for drawing pinecone
Common mistakes drawing pinecone
Self-evaluation checklist
Check if the sketch maintains correct proportions by comparing it to the original pinecone. Ensure the volume is believable by turning the drawing slightly to see if it maintains its 3D illusion. Verify that the contours of the scales contribute to the overall depth and form of the pinecone.
Frequently asked questions
How do I ensure the scales look correctly layered?
Focus on drawing the overlapping edges first. Each scale should partially cover the one beneath it, creating an illusion of depth. Start with the bottom scales and progressively work upwards.
Why does my pinecone look flat even with details added?
Check the light source and how shadows are cast on each scale. Re-evaluate the depth of the shadow lines and ensure they're consistently applied in the direction of the light source.
How can I capture the spiral pattern effectively?
Visualize the pinecone as a spiral staircase, where each scale is a step. Use light pencil strokes to map out the general spiral direction before detailing each scale, ensuring they align with this pattern.
More drawing lessons
Get a new drawing lesson delivered to your inbox every morning, free.
Subscribe to Draw Daily →