What you'll learn
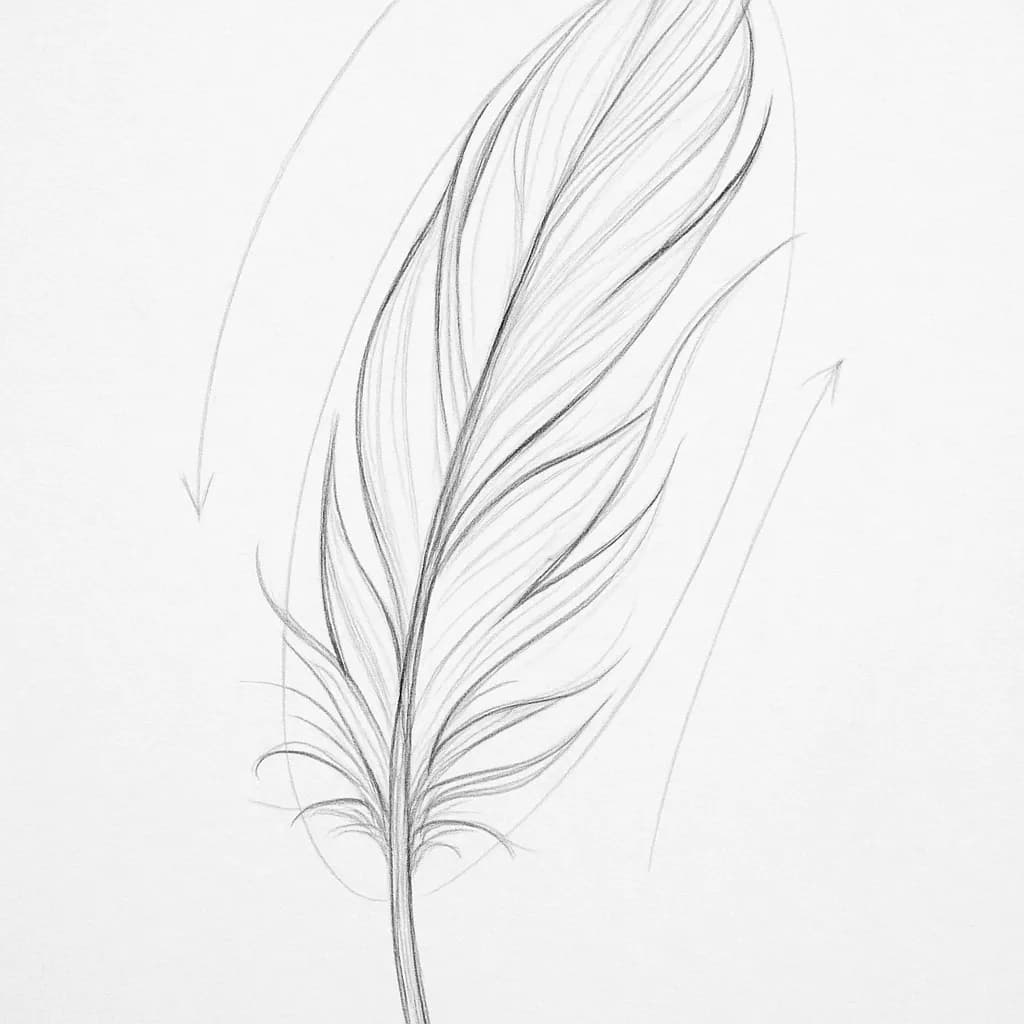
Drawing a feather requires careful observation of its intricate structure, allowing for practice in varying line weight and expressiveness. This exercise will help you capture the delicate and flowing nature of a feather, enhancing your ability to convey texture and form through line work.
What you'll need
Step-by-step: how to draw feather
Begin by observing the feather closely, noting the central shaft and the branching barbs.
Lightly sketch the shaft of the feather with a consistent line to serve as a guideline.
Add the barbs, varying line weight to emphasize the delicate nature of the feather, using lighter strokes for finer parts.
Enhance the texture by incorporating subtle curves and irregularities in the line work to suggest the softness and flow of the barbs.
Review and refine your lines, ensuring a balance between bold contours and soft, expressive details to capture the feather's essence.
Before you start: what to look at
Observe where the light hits the feather to identify areas of highlight and shadow. Notice the subtle curve of the central shaft and how barbs branch out symmetrically, but with slight irregularities. Pay attention to the proportion of the shaft to the rest of the feather and how barbs taper towards the edges.
Pro tips for drawing feather
Common mistakes drawing feather
Self-evaluation checklist
Check if the lines convey the feather's texture and form effectively, with a clear distinction between the shaft and barbs. Ensure your line work showcases a balance of bold and soft lines, capturing the feather's intricate details.
Frequently asked questions
How do I make the barbs look realistic?
To make the barbs look realistic, vary the line weight as you draw them. Use lighter lines for the softer, finer parts and add slight curves to suggest their natural flow. Incorporate minor irregularities to capture their organic appearance.
What perspective should I choose for drawing a feather?
Choose a perspective that highlights the feather's length and curvature. A slight angle can add depth, showing off the shaft's gentle bend and the barbs' natural asymmetry. This perspective helps convey the feather's three-dimensional form.
Why does my feather drawing look stiff?
Your drawing may appear stiff if the lines are too uniform or straight. Incorporate subtle curves and vary the line weight to suggest softness and movement. Observing how the feather flows will guide you in adding expressive details.
More drawing lessons
Get a new drawing lesson delivered to your inbox every morning, free.
Subscribe to Draw Daily →