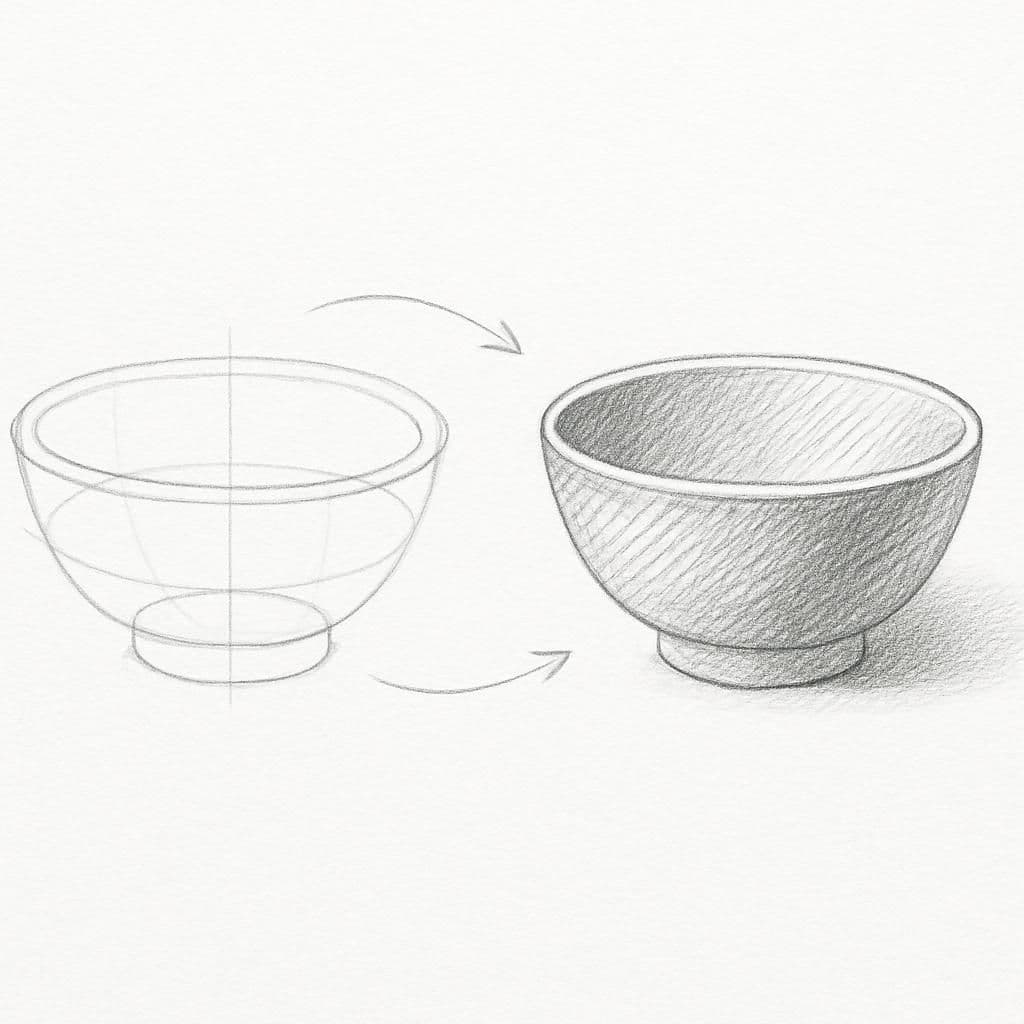
What you'll learn
Drawing a ceramic bowl helps beginners understand light direction and the creation of value gradients on curved surfaces. The smooth texture of the bowl provides an ideal surface for practicing subtle changes in shading using hatching.
What you'll need
Step-by-step: how to draw ceramic bowl
Sketch the basic outline of the bowl with light lines, focusing on its symmetry.
Identify the light source direction and lightly mark where the highlights and shadows will be.
Use hatching to develop the mid-tones on the bowl, maintaining even spacing for uniform shading.
Deepen the shadow areas with denser hatching lines to create contrast and emphasize the bowl's curvature.
Before you start: what to look at
Before drawing, notice the rim of the ceramic bowl: observe how it curves and how the light reflects off it. Pay attention to the bowl's contour and how the bottom part is more in shadow. Notice where the highlight is strongest to guide your shading later.
Pro tips for drawing ceramic bowl
Common mistakes drawing ceramic bowl
Self-evaluation checklist
Ensure there is a clear distinction between light and shadow areas, and check if the shading smoothly transitions in value to enhance the form of the bowl.
Frequently asked questions
How do I ensure the bowl looks symmetrical?
Start by sketching a vertical guideline down the center of your paper. Use this as a reference point, and check both sides of the bowl against it as you draw to maintain symmetry.
What is a common challenge when shading a ceramic bowl?
A common challenge is achieving smooth gradients with hatching. Focus on consistent pressure and spacing. Practice will improve your control over transitions between light and shadow.
How do I capture the glossy texture of the ceramic?
To suggest a glossy surface, make sure to leave the highlight areas nearly untouched. Use lighter hatching around these spots and ensure the dark areas are solid but not overly textured.
More drawing lessons

Get a new drawing lesson delivered to your inbox every morning, free.
Subscribe to Draw Daily →