What you'll learn
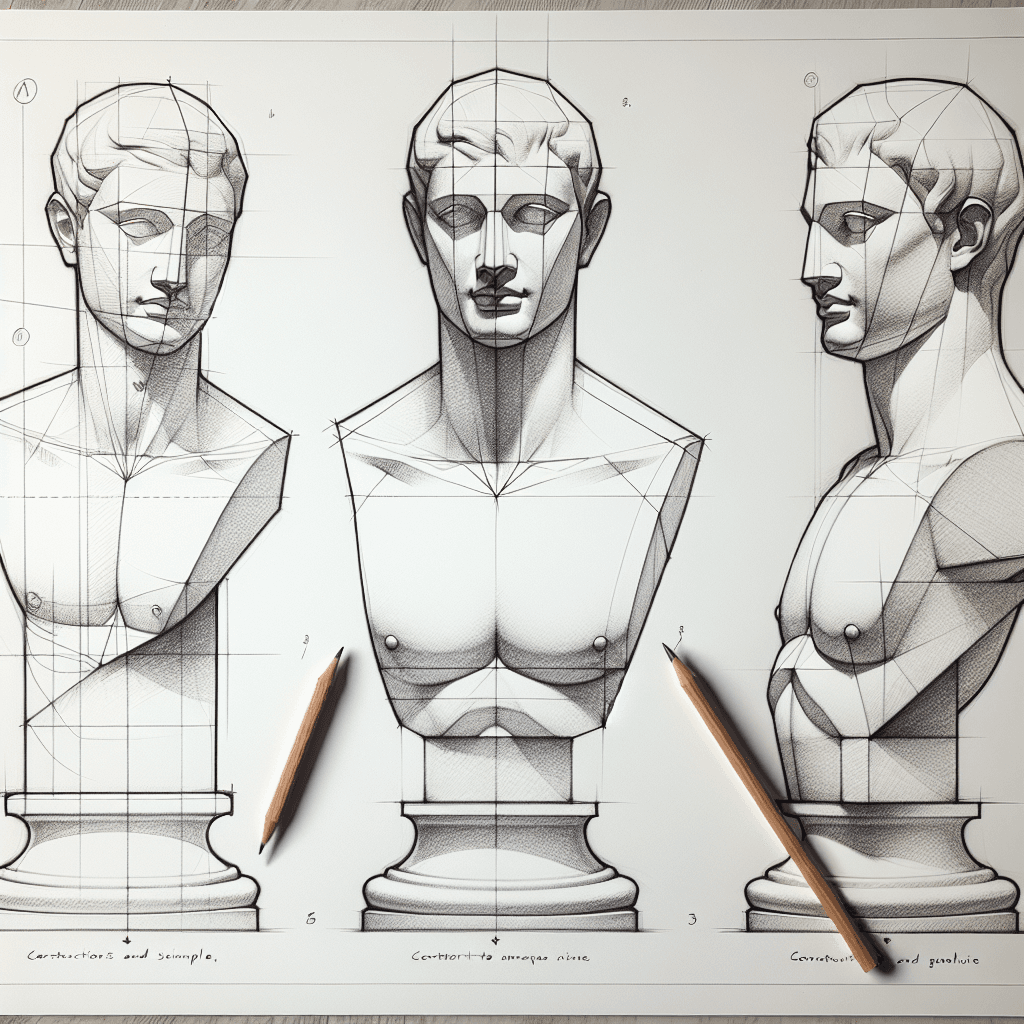
Drawing a sculpture bust is excellent for practicing proportion and volume due to the clear, structured forms of the head and shoulders. This exercise helps beginners understand the relationship between different parts of the head and how to depict them in three dimensions.
What you'll need
Step-by-step: how to draw sculpture bust
Begin by drawing a simple oval for the head and a trapezoid for the shoulders to establish the basic shapes.
Add guidelines for the eyes, nose, and mouth to help place facial features proportionally.
Sketch the neck connecting the head to the shoulders, keeping in mind its cylindrical form.
Outline the major facial features, like the eyes, nose, and mouth, focusing on their position and proportion to one another.
Add volume to the face by shading areas that recede, such as under the cheekbones and around the nose.
Refine the drawing by adding details and adjusting lines to better capture the volume and proportions.
Before you start: what to look at
Before drawing, observe the contour of the jawline and how it transitions into the neck. Notice the highlights on the forehead and cheekbones where the light lands. Pay attention to the distance between the eyes and the width of the nose to maintain proper proportions.
Pro tips for drawing sculpture bust
Common mistakes drawing sculpture bust
Self-evaluation checklist
Ensure the facial features appear balanced and the overall volume of the bust is convincingly three-dimensional. Check that the proportions of the head and shoulders are consistent with your reference.
Frequently asked questions
How do I handle different textures within the sculpture bust?
Focus on light and shadow to convey texture. Smooth areas will have subtle transitions, while rough or detailed sections will cast more distinct shadows. Use varying pencil pressure to suggest these textures.
What is the trickiest part of drawing a sculpture bust?
The nose can be challenging due to its complex shapes and angles. Ensure the base of the nose aligns correctly with the bottom of the ears, and pay attention to the shadows that define its form.
How should I approach drawing from a three-quarter view?
In a three-quarter view, one side of the face will appear smaller due to foreshortening. Use guidelines to align the facial features correctly and observe how the far eye is partially obscured by the nose.
More drawing lessons
Get a new drawing lesson delivered to your inbox every morning, free.
Subscribe to Draw Daily →